

Choose the Right Drywall Edge Tool for a Cleaner Finish
Choose the tool by the job at hand:
- Use a drywall rasp to remove rough gypsum and smooth a cut edge.
- Use a chamfer plane or bevel cutter to create a clean V-groove on cut butt joints before taping.
- Use a rotary drywall router for fast cutouts around electrical boxes, windows, and doors.
- Use corner bead rollers, clinch-on tools, and corner finishers to install and finish protected outside or inside corners.
The right drywall edge tool helps tape sit flatter, gives joint compound room to bond, and reduces the chance of a raised seam. Sharp blades, comfortable grips, adjustable bevel settings, and practical dust control can make a meaningful difference on repetitive work.
A rasp is usually the best first choice for small fitting corrections. A chamfer tool is better when you need a consistent bevel along a long cut edge. For production hanging, a guided router saves layout time on openings, while dedicated corner tools help keep bead straight and corner lines crisp.
At Western Wholesale Supply, our third-generation building-materials team in Idaho brings hands-on experience supporting residential and commercial drywall projects. We focus on practical drywall edge tool guidance that helps contractors choose dependable materials and keep work moving.
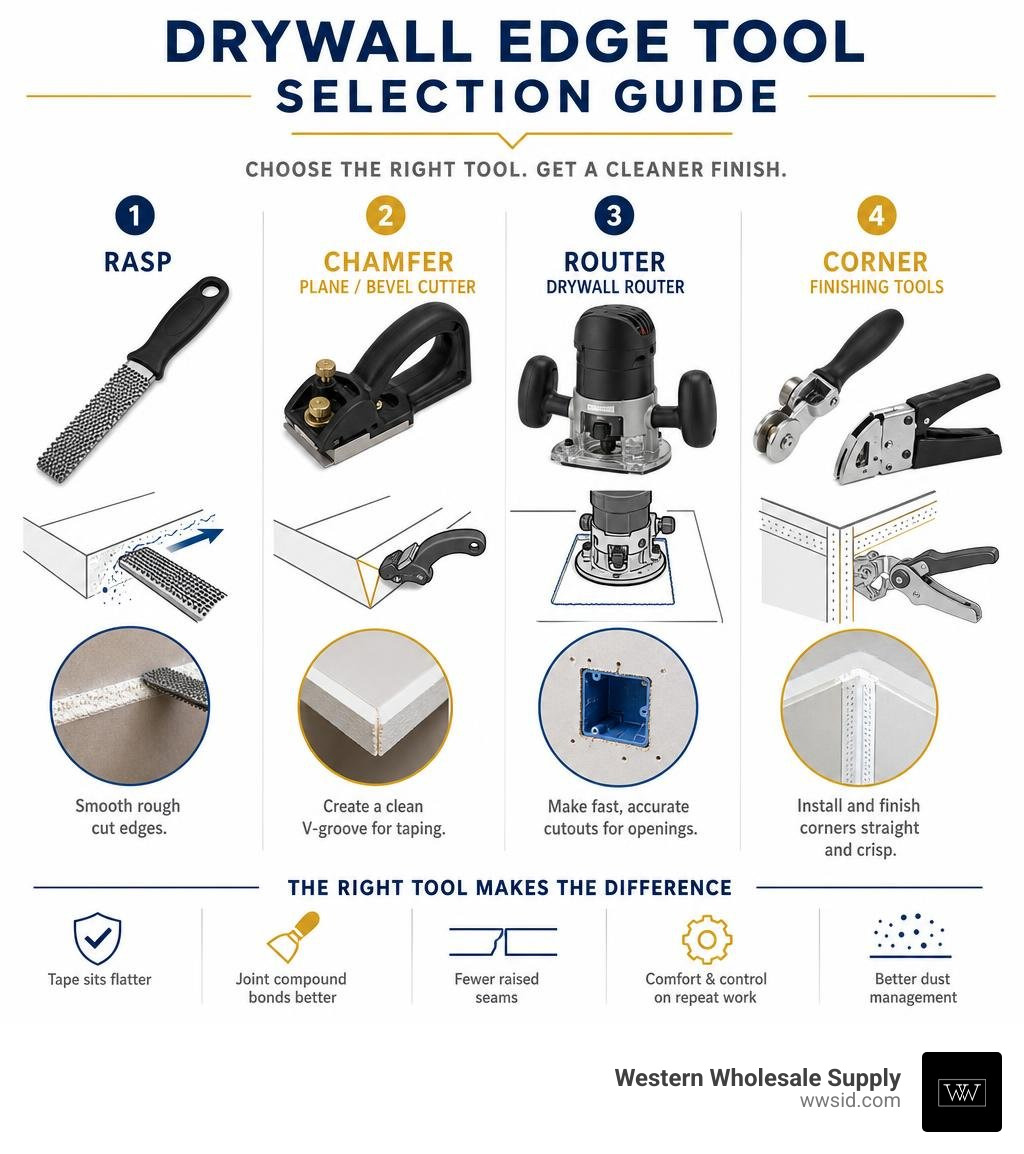
Quick drywall edge tool definitions:
Primary Types of Drywall Edge Tools and Their Uses
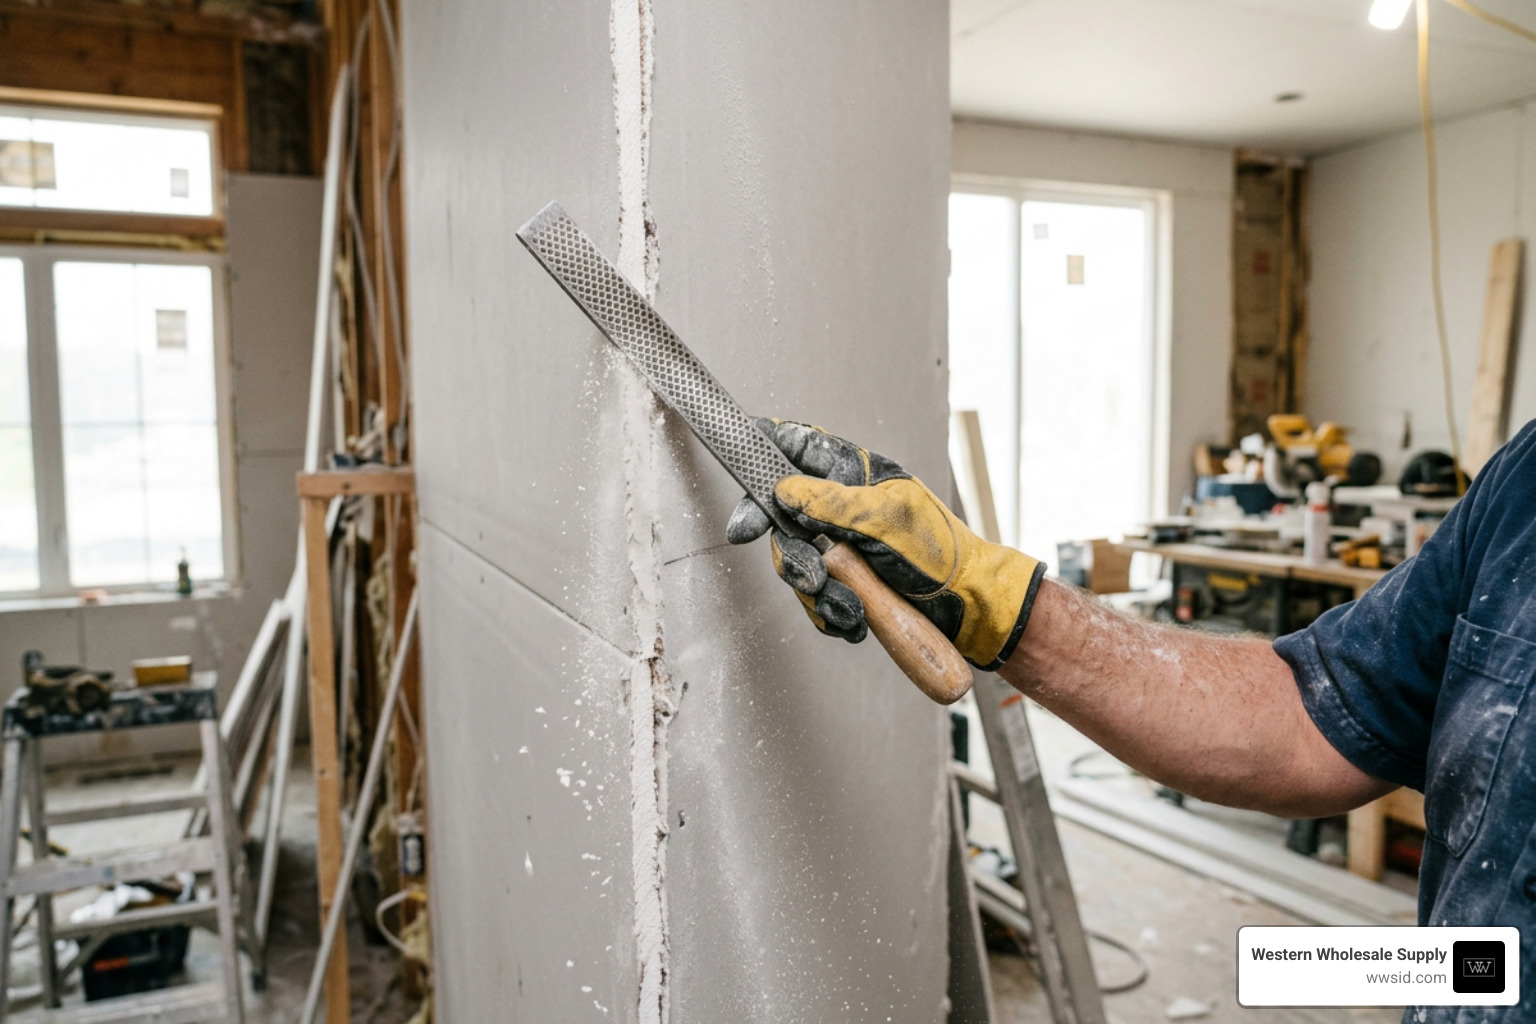
When hanging gypsum board, cut edges are inevitable. Factory edges come pre-tapered to accommodate joint tape and compound, but the moment you score and snap a board to fit a wall, ceiling, or opening, you leave an un-tapered, raw gypsum edge. To ensure your seams finish flat without unsightly bulges, mastering your drywall tools 101 fundamentals starts with selecting the right edge-shaping equipment.
Drywall edge tools fall into several categories depending on whether you need to level core material, profile an edge, route around an obstruction, or bed structural trim.
Drywall Rasps and Edge Shapers
A drywall rasp is the frontline tool for cleaning up jagged core material after a score-and-snap cut. Traditional carpentry rasps tend to clog instantly with soft gypsum, but specialized drywall rasps feature open-pattern, bi-directional teeth. These allow you to shape and trim on both the push and pull stroke without binding.
Modern premium drywall rasps frequently feature multi-zone grinding surfaces:
- Coarse teeth for rapid stock removal and aggressive leveling.
- Fine teeth for smoothing the gypsum core flush with the paper facing.
- Side notching teeth designed to carve out small reliefs for conduit, pipes, or electrical box lips.
Advanced hand shapers also integrate in-handle dust collection chambers. When you shave an edge, the debris channels into the handle cavity; simply tip the tool upright over a scrap bin to empty it, keeping your boots and floors clear of fine dust.
Chamfer Planes and Bevel Cutters
Where a rasp grinds flat, a chamfer plane profiles the board edge. When two raw, non-tapered butt edges meet on a wall, taping directly over them creates a high spot or “hump” that requires extensive feathering to hide.
Chamfer planes (often called bevel cutters or plasterboard fast cutters) use razor-sharp carbon steel utility or specialty blades set at precise 45-degree or 60-degree angles. Running a chamfer tool along the cut edge creates a uniform 45° or 60° V-groove channel. This recess simulates a factory tapered edge, giving joint compound and tape a dedicated pocket to seat into.
High-end chamfer planes feature die-cast aluminum chassis with fluorinated glide bases that slide effortlessly without scuffing or tearing the face paper. Many also offer micro-adjustable depth controls (ranging from 1mm to 4mm) to tailor the groove depth to the specific tape and compound system you are installing.
Corner Bead Tools and Angle Finishers
Finishing external and internal corners requires dedicated shaping and setting tools to secure corner bead and ensure dead-straight lines:
- Clinch-On Tools: Used for standard metal corner bead. Struck with a 1-1/2 lb rubber mallet, these tools mechanically crimp 1-1/8 inch or 1-1/4 inch metal bead directly onto the drywall core, eliminating the need for nails or screws that can pop later.
- Paper-Face Corner Rollers: Essential for embedding paper-faced or tape-on corner trim. Rollers feature angled wheels (designed for 90-degree outside corners or 3/4-inch bullnose profiles) that apply uniform pressure, squeezing out excess mud evenly from behind the paper tape.
- Corner Finishers (Angle Heads): These commercial wiping heads mount to compound tubes or corner boxes. Engineered with CNC-machined anodized aluminum bodies, robotically welded stainless steel frames, and durable carbide blades, corner finishers wipe, embed, and feather mud on both internal corner faces in a single mechanical pass.
- Compound Hoppers: Dedicated mud hoppers run paper-backed beads through a mud reservoir, applying a perfectly measured layer of joint compound to the inside of the trim before it touches the wall.
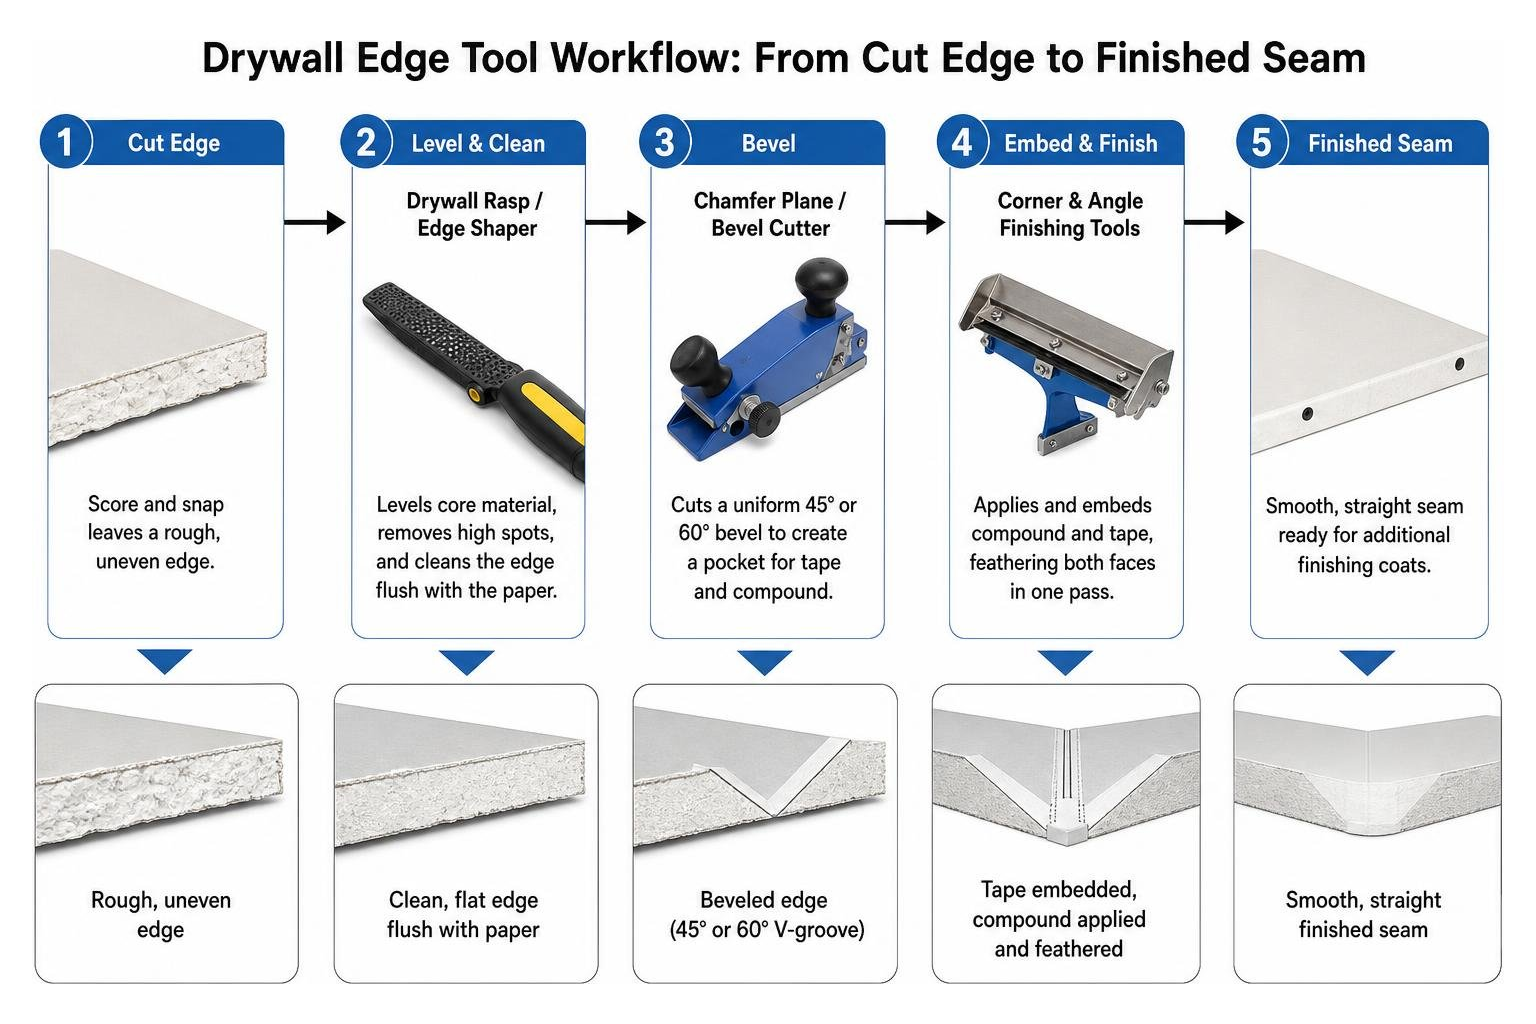
Choosing the Right Drywall Edge Tool for Your Project
Selecting the ideal tool depends on panel thickness, joint layout, and the level of production speed required. When trimming boards, matching the tool to the step-by-step workflow outlined in how to cut drywall in 6 simple steps saves massive amounts of time. In fact, professional jobsite surveys show that using dedicated edge-shaping tools helped crews achieve 96% faster project completion times compared to shaving edges manually with standard utility knives.
Selecting a Manual Drywall Edge Tool for Beveling and Rasping
When choosing a manual edge planer or rasp, consider the following technical factors:
- Bevel Angle Versatility: Look for tools that accommodate 45-degree angles for standard butt joints, or 22.5-degree/60-degree angles for specialized wide-joint or multi-angle transitions.
- Board Thickness Compatibility: Standard residential and commercial drywall boards come in 9.5mm (3/8 in), 12.5mm (1/2 in), and 15mm (5/8 in) thicknesses. Ensure your tool’s throat width and guide fence comfortably seat across these dimensions.
- Ergonomics: Edge profiling requires repetitive pulling pressure. Non-slip elastomer grips and balanced tool weight prevent wrist fatigue during large-scale hanging.
- Clean Slicing Action: Precision-machined planes with replaceable carbon steel blades prevent face paper fraying. Contractors using dedicated chamfer planers report that 98% said edges were smoother and more precise, virtually eliminating blisters caused by loose paper fibers.
Power Drywall Edge Tool Options: Rotary Cutouts vs. Manual Shapers
For high-volume residential and commercial jobs, power cutout tools (often called drywall routers) complement manual edge tools. While manual shapers are unmatched for preparing long perimeter seams, rotary tools excel at cutting openings after the gypsum board is tacked loosely to the framing.
Drywall routers turn 1/8-inch helical guide bits at high RPMs. The bit features a smooth, unthreaded pilot tip that rides along the outside edge of an electrical outlet box or the inside face of a window rough opening without chewing into the underlying material.
| Feature / Metric | Manual Drywall Edge Shaper / Chamfer | Rotary Drywall Cutout Tool (Router) |
|---|---|---|
| Primary Function | Beveling butt joints, smoothing core edges | Plunge-cutting outlet boxes, doors, and window returns |
| Power Source | Manual hand power | Corded or Cordless 18V/20V/60V Battery |
| Dust Production | Minimal (large shavings, contained) | High (fine airborne particulate) |
| Best Used On | Pre-hung panels on sawhorses or floor | Wall-mounted panels tacked over framing |
| Typical Cut Direction | Linear pull along raw board edge | Counterclockwise (outlets) / Clockwise (framing) |
| Setup Time | Instant | Requires bit depth calibration |
When using a drywall router, directional movement is critical:
- Outlet Boxes (Outside Cuts): Always move counterclockwise. The rotational torque of the spinning bit pulls the guide tip snugly against the outer perimeter of the junction box rather than pushing it off-line.
- Door and Window Jambs (Inside Cuts): Always move clockwise. This keeps the guide bit riding firmly against the interior face of the framing stud.
Best Practices, Maintenance, and Common Mistakes
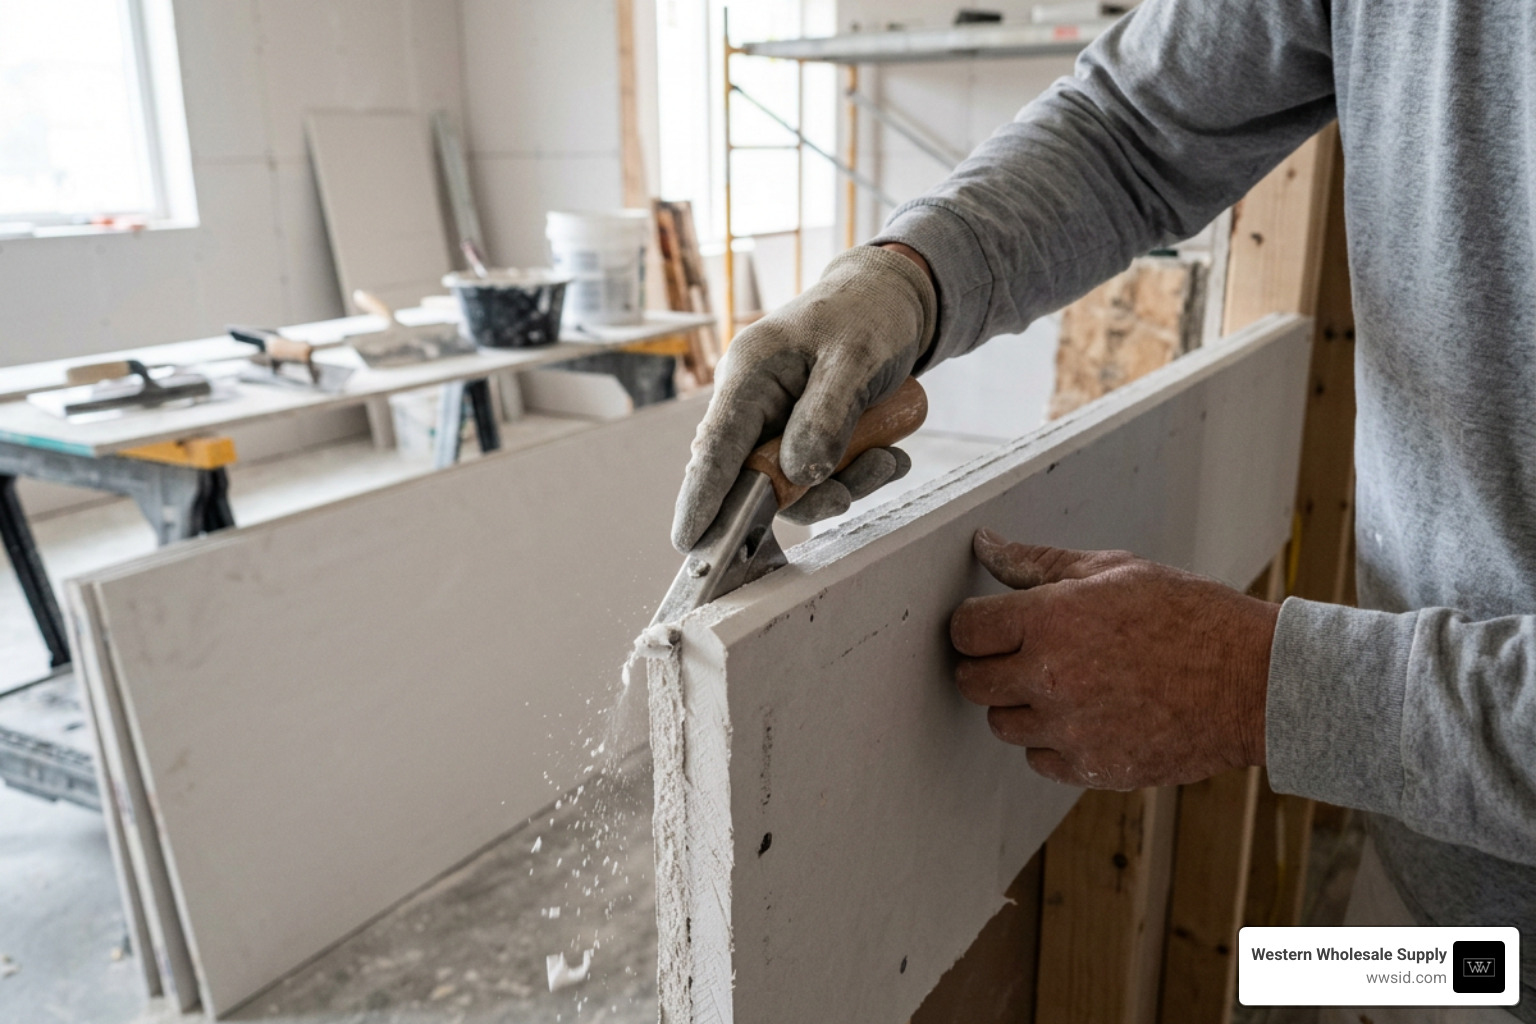
A clean edge makes all the difference when moving to finishing stages. When you use proper chamfering techniques rather than haphazard knife cuts, contractors note a 97% cleaner workspace with less dust, speeding up daily cleanup across active jobsites.
To ensure flat, ridge-free seams, follow the recommended supply protocols highlighted in the definitive guide to drywall finishing supplies.
Step-by-Step Guide to Edge Chamfering and Planing
- Secure the Board: Rest the scored drywall panel securely on a bench, sawhorse, or on edge against the wall studs.
- Inspect the Cut Edge: Check for high gypsum nodules or torn paper tags. If large chunks remain, pass a bi-directional rasp over the rough zone to level the core.
- Align the Chamfer Plane: Seat the tool’s fence against the front face of the drywall board, aligning the 45-degree blade with the raw corner edge.
- Draw the Plane Smoothly: Using steady, continuous pressure, pull or push the planer along the full length of the cut edge. Let the sharp blade do the work—excessive downward force can crush the gypsum core.
- Clear the Channel: Brush away any loose gypsum flakes before hanging the sheet.
- Alternative Materials: Quality chamfer planes can also be used to bevel soft wood trim, foam insulation panels, and thin rigid PVC trims without binding.
Rotary Tool Safety and Operational Protocols
Operating a power cutout tool requires strict attention to jobsite safety:
- Wire Protection: Before hanging a board over electrical junction boxes, always verify power is turned off at the breaker and ensure wires are pushed completely to the back of the box to prevent the spinning bit from cutting insulation.
- Bit Depth Calibration: Set the router bit guide shoe so the smooth guide tip extends no more than 1/8 inch past the backside of the drywall panel. If the bit is set too deep, it can strike hidden pipes, wiring, or structural ties.
- PPE Requirements: Rotary tools throw significant fine gypsum dust. Always wear eye protection and an approved OSHA-compliant particulate respirator (N95 or better).
- Controlled Plunge: Never sink screws right next to the cutout before routing. Push the center of the drywall sheet tight against the box with your hand or knee, plunge the tool directly into the center of the box cavity, move outward until the bit hits the interior edge, hop over the lip, and navigate counterclockwise.
Integrating Edge Preparation into Taping and Finishing
Proper edge profiling directly impacts your taping workflow. When you install drywall panels with prepared, beveled edges, you leave a uniform channel that easily accepts your base coat of compound and embedding tape. For expert techniques on laying down base coats and feathering mud over edge beads, consult our A-Z guide to taping knives.
Explore our comprehensive selection of joint treatments & trims to find compatible paper-faced trims, structural outside beads, and setting-type joint compounds.
When bedding corner trim:
- Coat paper-faced corner bead evenly using a dedicated corner bead hopper.
- Align the bead squarely over the exterior drywall corner.
- Use an outside corner roller from dependable brands like USG Sheetrock Tools or Columbia Taping Tools to embed the bead securely, squeezing out air pockets and excess mud.
- Wipe down and feather the edges using professional-grade taping knives from Hyde, Marshalltown, or USG Sheetrock Tools for seamless transitions.
Frequently Asked Questions About Drywall Edge Tools
What is the difference between a drywall rasp and a drywall chamfer tool?
A drywall rasp is an abrasive, cheese-grater-style shaping tool designed to grind down high spots, level uneven core breaks, and smooth cut edges flush. A drywall chamfer tool is a hand plane fitted with razor-sharp blades that cuts a continuous 45-degree or 60-degree angled bevel along the front edge of a cut board to create a recessed V-groove for tape and joint compound.
Can drywall edge tools be used on materials other than gypsum board?
Yes. Manual chamfer planes and multi-tooth drywall rasps are effective on plasterboard, sound-damped panels like Quietrock EZ Snap, cement backer boards like Durock (using carbide-tipped rasps), soft woods, and rigid PVC plastic corner trims. For acoustical ceiling work, edge-trimming principles also apply to CertainTeed ceiling tiles, but use the ceiling-tile cutting or scoring tool recommended for that panel rather than aggressively beveling it like drywall. When working with harder materials, replace blades frequently to maintain clean, chatter-free cuts.
Why should cut drywall edges be chamfered before taping?
Factory drywall edges feature a recessed taper designed to accommodate joint tape and mud coats without bulging past the wall plane. When a raw, square cut edge meets another panel at a butt joint, there is no recessed pocket. Chamfering creates an artificial V-groove channel that allows joint compound to penetrate deep into the core and embeds tape beneath the wall surface, preventing joint ridges and blistering.
Conclusion
Mastering edge preparation is the defining difference between wavy, noticeable drywall joints and dead-flat, professional wall surfaces. By outfitting your crew with dedicated drywall rasps, precision chamfer planes, reliable cutout routers, and professional corner bead rollers, you ensure every seam sits flat and finishes cleanly.
At Western Wholesale Supply, we are an independent, veteran-owned, third-generation family business supplying commercial and residential contractors across Eastern Idaho, Western Wyoming, and surrounding areas since 1963. Backed by over 60 years of hands-on building materials experience, our showrooms carry the industry’s most trusted commercial finishing brands—including Hyde, USG Sheetrock Tools, Columbia Taping Tools, and Marshalltown, as well as dependable Grabber and Brighton Best fasteners.
Visit our local showrooms or reach out to our team to explore our complete inventory of professional tools & fasteners and discover how our reliable, on-time jobsite delivery keeps your projects moving forward on schedule.
