

Choosing a Drill for Drywall Hanging
For a small drywall job, use a cordless drill/driver with a #2 Phillips drywall screw-setter bit. The bit helps stop screws just below the surface without tearing the paper. Set the drill’s clutch low and test the depth on a scrap piece first. For a full room or repeated jobs, a dedicated drywall screw gun offers faster driving and more consistent depth.
Your choice also depends on the framing: use coarse-thread drywall screws for wood studs and fine-thread screws for light-gauge steel studs. Check the screw type and length before you start; Grabber is one fastener brand Western Wholesale Supply carries.
At Western Wholesale Supply, our third-generation building materials team works with contractors on drywall and steel-framing projects. We’ll help you choose a drill for drywall that fits the size and pace of your job.
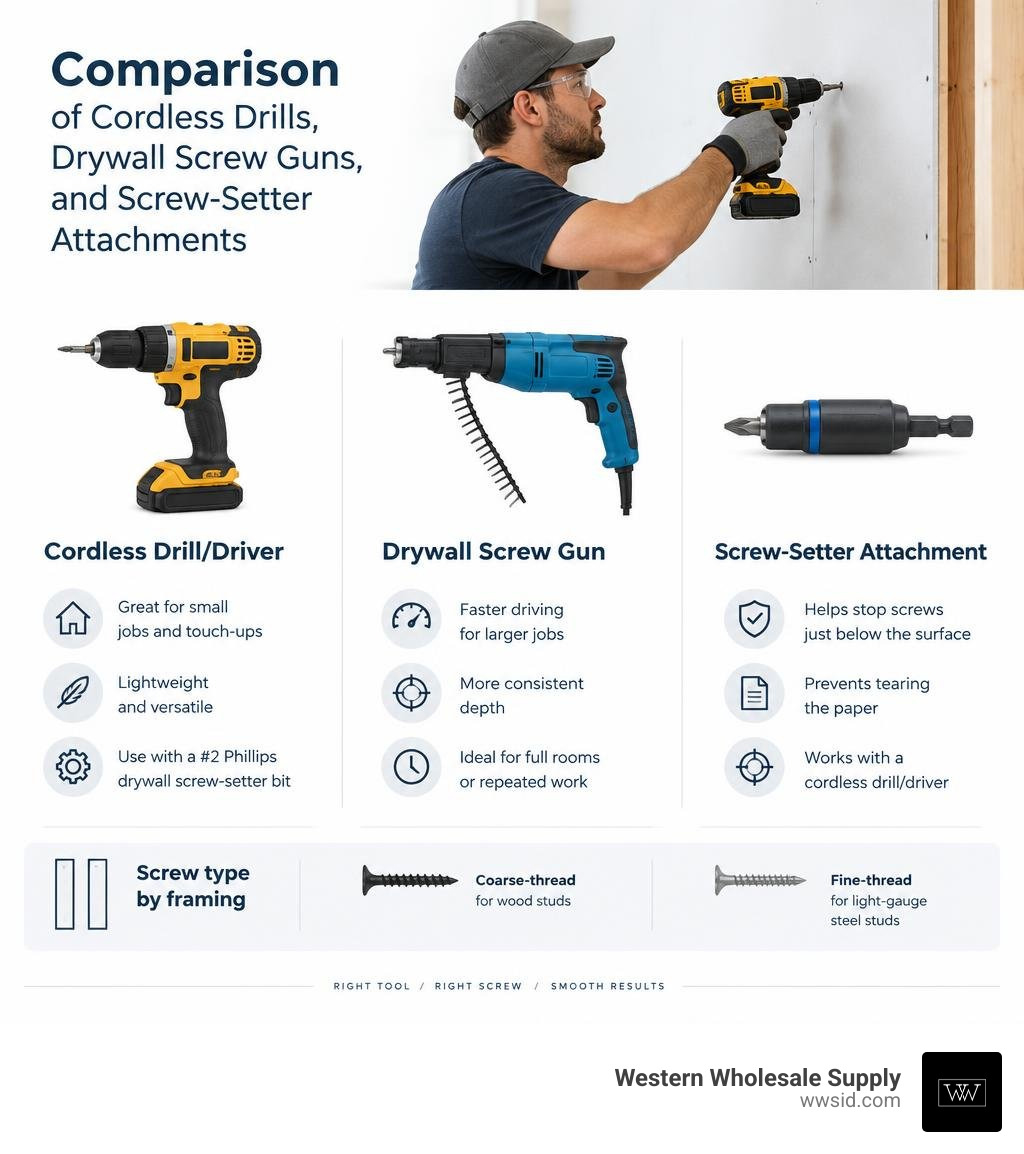
Basic drill for drywall glossary:
How to Choose the Right Drill for Drywall Installation
Selecting the right drilling and driving setup comes down to your project scope, speed requirements, and framing materials. When hanging sheetrock, you must balance rotational speed (RPM), torque delivery, ergonomic weight distribution, and runtime efficiency.
Standard drywall installation requires rapid rotation to seat screws cleanly into studs before the gypsum core crumbles. However, excessive torque without proper depth regulation will instantly overdrive fasteners. Reviewing our battery screw gun buyer checklist helps clarify key motor and clutch features. Pairing the right driving tool with your core drywall tools layout ensures smooth, continuous workflow from the first board to the final corner.
Dedicated Drywall Screw Guns vs. Cordless Drills
A dedicated drywall screw gun is engineered specifically for hanging board at high volume. Running between 4,000 and 6,000 RPM, it operates much faster than a standard cordless drill/driver (which typically tops out around 1,500 to 2,000 RPM). Drywall screw guns feature an adjustable, depth-sensitive nosecone and a silent clutch mechanism that disengages the drive bit the millisecond the screw hits the exact preset depth—even while the motor continues spinning. Modern cordless models also feature intelligent auto-start modes, activating the motor only when forward pressure is applied against the drywall.
In contrast, general-purpose cordless drill/drivers rely on a mechanical slip clutch or trigger control. An impact driver uses rotational blows to drive fasteners, which can easily shatter fragile gypsum cores.
| Feature | Drywall Screw Gun | Cordless Drill/Driver | Impact Driver |
|---|---|---|---|
| Speed (RPM) | High (4,000–6,000 RPM) | Moderate (1,200–2,000 RPM) | Variable (0–3,200 RPM) |
| Depth Control | Micro-adjustable nosecone clutch | Mechanical slip clutch collar | Trigger modulation only |
| Core Protection | Prevents paper tearing automatically | High risk without setter bit | Frequent core blowouts |
| Tool Weight | 2.5–3.5 lbs (well balanced) | 3.5–5.0 lbs | 2.0–3.5 lbs |
| Best Application | Multi-sheet rooms & framing | Small repairs & drilling pilot holes | Structural framing & heavy lag bolts |
Collated Screw Gun Attachments and Auto-Feed Systems
For extensive commercial jobs, multi-family builds, or ceiling work, auto-feed collated systems maximize installation speed. Collated attachments feed plastic-strip-mounted screws continuously to the drive bit, allowing one-handed operation while your free hand positions or braces the drywall sheet.
Leading attachment systems include:
- Simpson Strong-Tie Quik Drive (e.g., PRO200G2): Built with a slim profile and smooth nose to prevent board scuffing while maintaining access in tight interior corners.
- DEWALT Collated Drywall Attachments: Offer full 360-degree tool-free rotation and quick-release buttons for rapid strip reloads.
- Milwaukee M18 Collated Attachments: Designed to integrate with high-output cordless screw guns for high-speed overhead fastening.
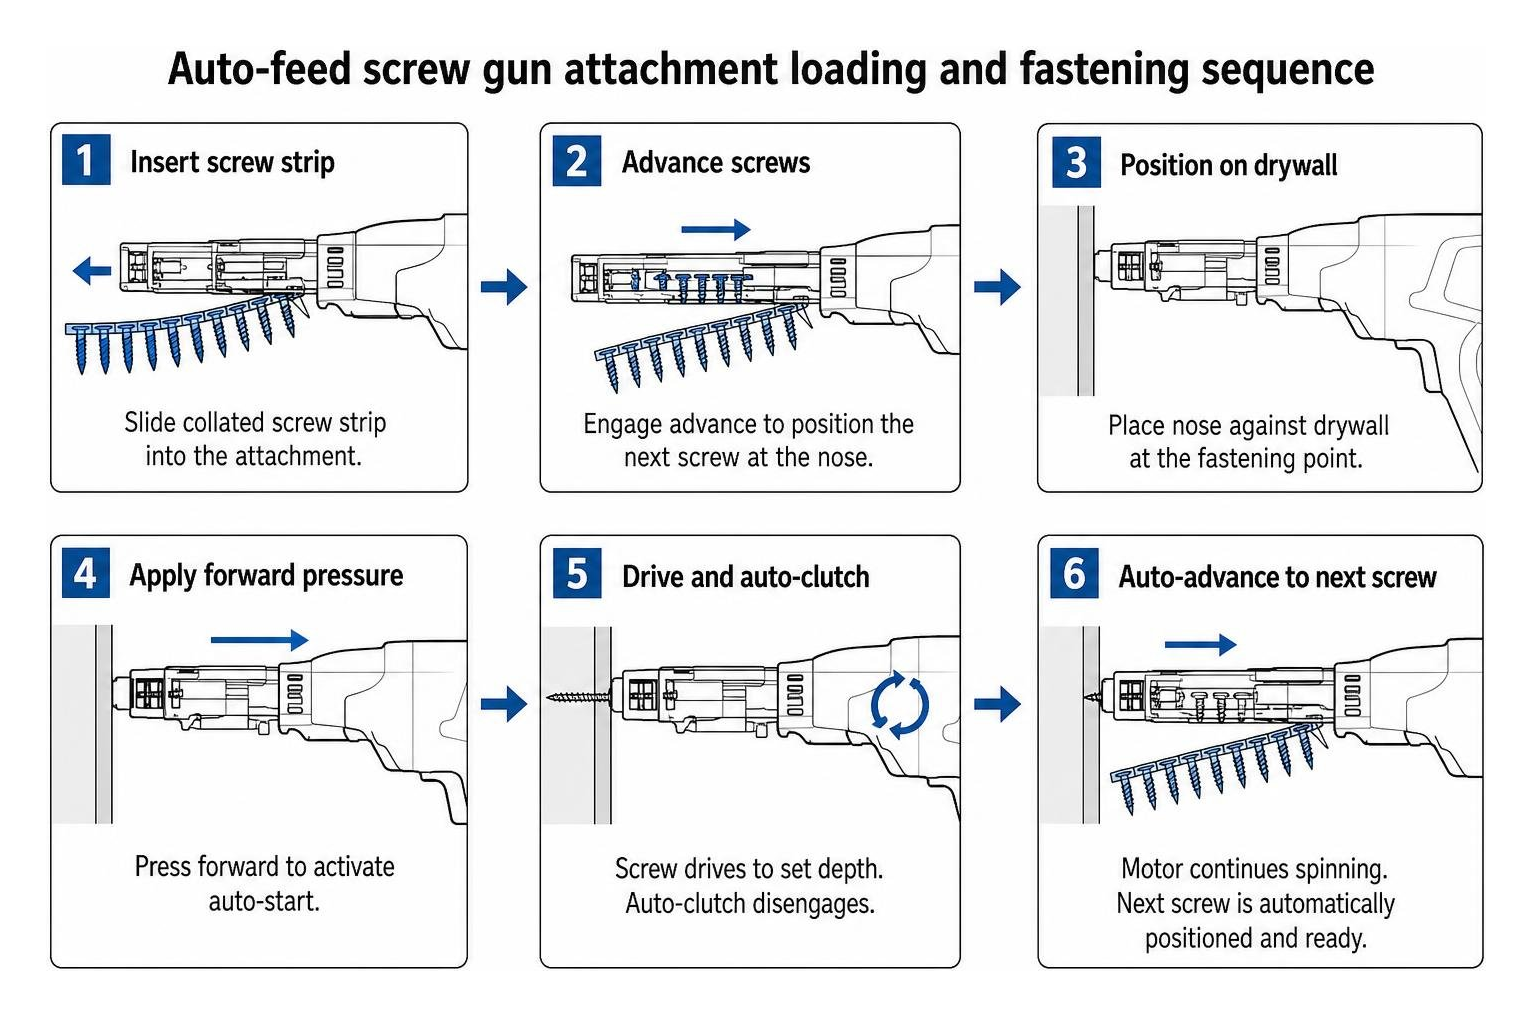
Precision Fastening: Depth Control and Clutch Settings
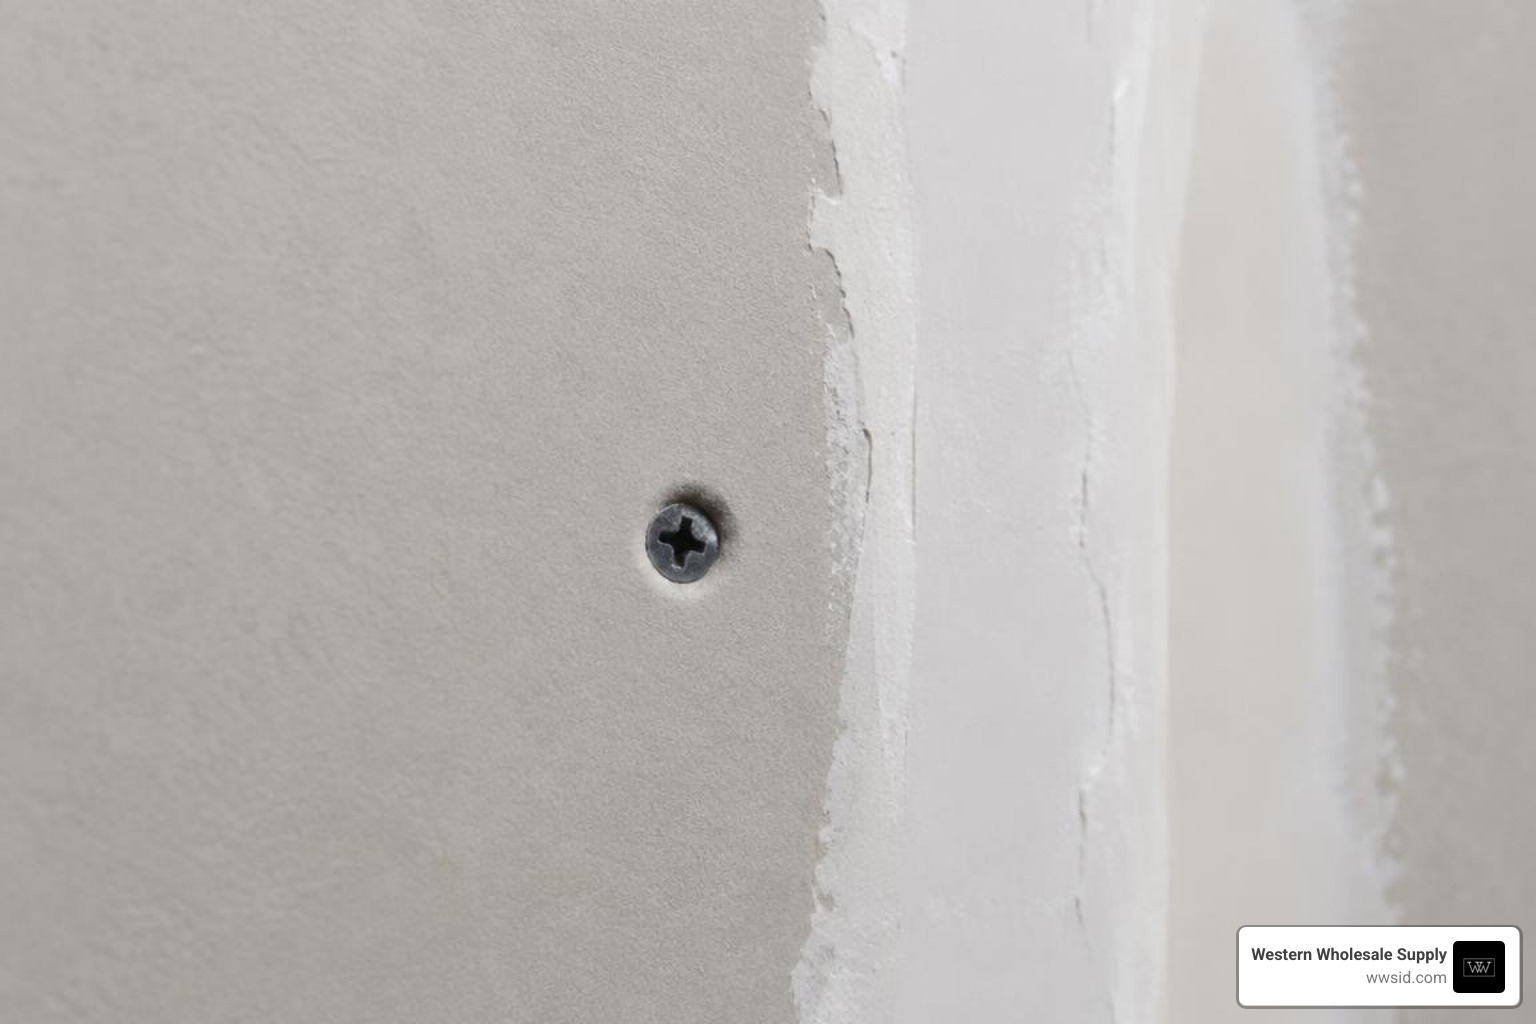
Driving a drywall screw requires exact depth control: the fastener head must seat slightly below the paper face, creating a shallow dimple for joint compound without breaking the paper liner. If the paper tears, the screw loses holding strength, leading to loose boards and popped fasteners. Master our recommended screw depth setting methods to maintain structural integrity across every sheet.
Using a Standard Drill for Drywall Fastening
If you are using a standard cordless drill for a small repair or single-sheet patch, dial back the mechanical slip clutch to its lowest working number. A low clutch setting allows the chuck to slip before driving the fastener too deep into the gypsum.
Maintain a straight 90-degree angle to the wall and feather the variable-speed trigger as the screw seats. Avoid high RPMs on standard drills, as rotational momentum can override the slip clutch and punch straight through the paper. Keep a manual hand screwdriver nearby to snug up slightly under-driven screws without risking tool-induced paper blowout.
Drywall Screw Setter Bits and Dimpler Attachments
A standard drill can be converted into an effective drywall tool using a drywall screw-setter bit (often called a dimpler). These accessories use a 1/4-inch hex shank compatible with any standard drill chuck.
Key features include:
- Steel Depth Ring: A rounded metal stop collar contacts the drywall surface and disengages the driver tip when the screw reaches target depth.
- Internal Clutching Mechanism: Prevents the bit from spinning against the fastener head, stopping cam-out and preserving the #2 Phillips drive tip.
- Magnetic Bit Core: High-strength magnets secure fasteners in position for easy one-handed placement.
Selecting Screws for Wood and Steel Framing
Matching screw threading and gauge to your substrate is essential for secure fastening and code compliance.
- Wood Framing: Use coarse-thread drywall screws. The wide, deep threads grip soft and hardwood lumber securely. For standard 1/2-inch drywall on wood studs, 1-1/4-inch screws are the industry standard.
- Light-Gauge Steel Studs (25 to 20 Gauge): Use fine-thread drywall screws. The higher thread pitch drives cleanly through sheet steel without stripping the metal framing.
- Heavy-Gauge Steel Framing (18 to 12 Gauge): Use self-drilling screws (Tek-point). These feature miniature drill bits on the fastener tip to bore through thick flange steel. Review our detailed drywall to metal stud fastening guide for full gauge-matching charts.
At Western Wholesale Supply, we carry heavy-duty fasteners from proven industry manufacturers like Grabber and Brighton Best, ensuring your assemblies hold securely over time.
Drilling Holes in Drywall: Bit Selection and Clean Cutting
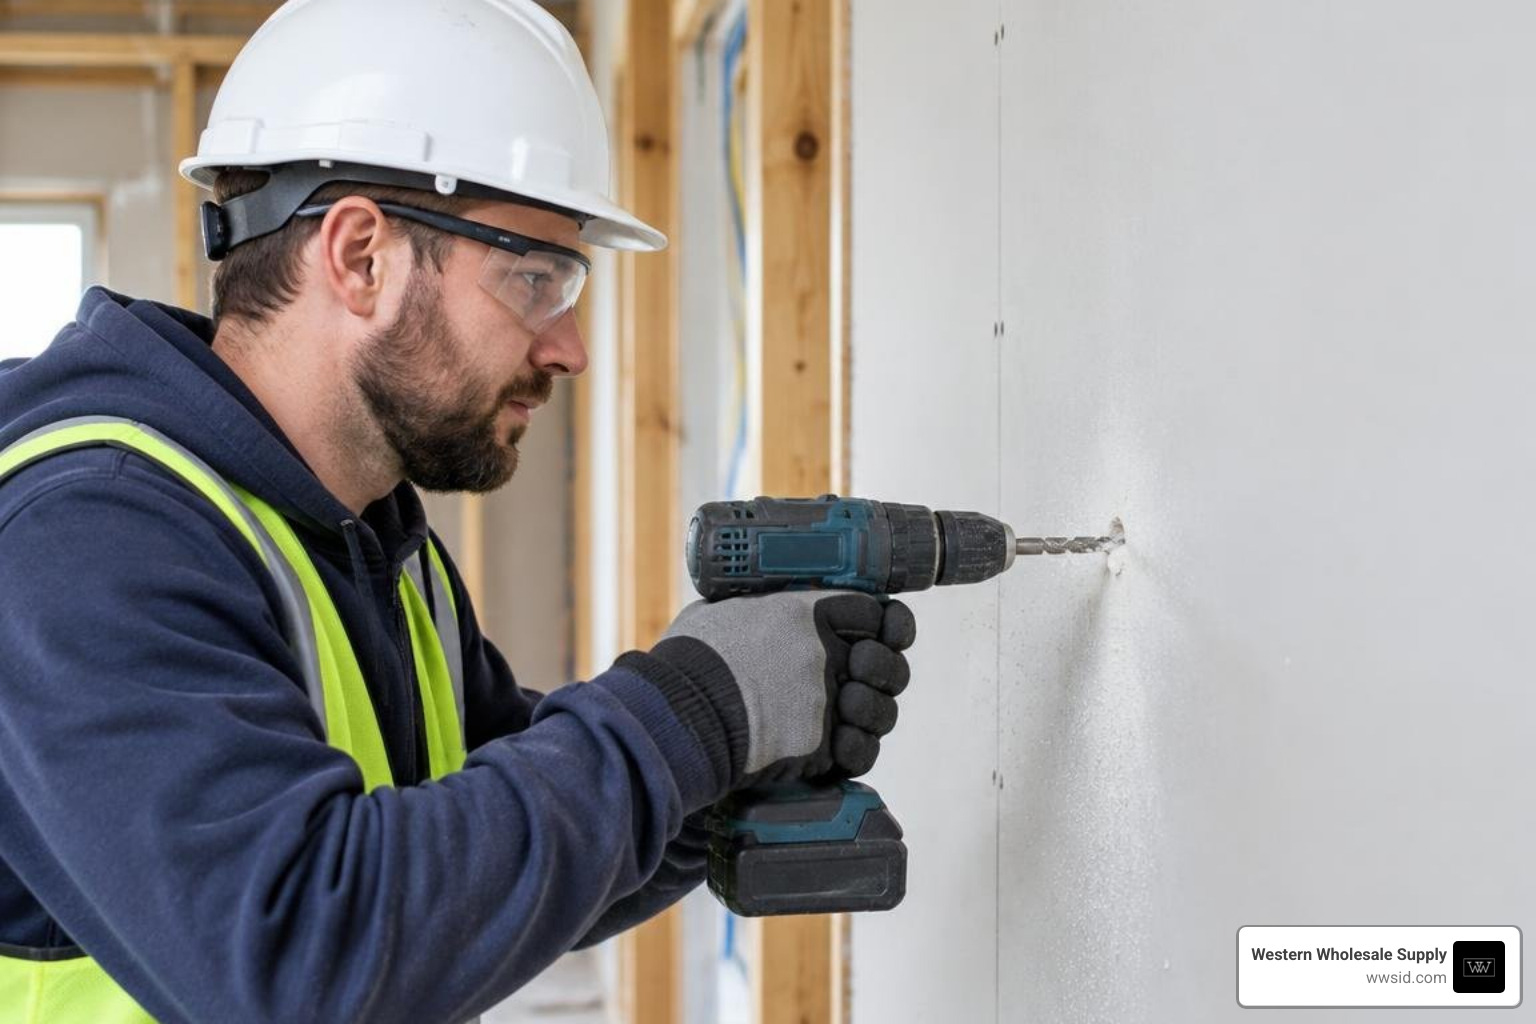
Hanging fixtures, running conduit, or installing drywall anchors requires clean, sharp holes that preserve the surrounding gypsum and paper facings. A dull bit or heavy feed pressure can tear face paper and shatter the board core. If you are preparing materials, review our essential gear checklist before making any cuts.
Selecting the Right Drill Bits and Drill for Drywall Anchors
Gypsum core material acts as an abrasive, quickly dulling standard cutting edges. Using the proper bit geometry ensures clean holes:
- Brad-Point and Twist Bits: A standard high-speed steel (HSS) twist bit works well for basic holes. Brad-point bits provide a sharp center spur that prevents bit walking on smooth drywall paper.
- Step Drill Bits (e.g., Dremel Max Life 629HP): Step bits allow you to bore progressively sized holes (from 1/16″ up to 1/4″) in a single pass without changing bits, creating smooth holes for anchor sleeves.
- Anchor Sizing: Always match your pilot bit diameter directly to the packaging instructions of your hollow-wall anchor or toggle bolt. If the hole is even 1/16-inch too large, the anchor will spin freely during screw insertion.
Cavity fixings mounted directly into drywall support between 15 and 35 kg (33 to 77 lbs) depending on board thickness and anchor design. For heavier fixtures, always secure directly into wood or steel framing.
Step Bits, Hole Saws, and Cutout Specialty Bits
For larger openings, use dedicated cutting accessories:
- Hole Saws: Fine-toothed bi-metal or carbide-grit hole saws produce clean round cuts for recessed can lighting and pipe pass-throughs. Learn more in our guide to clean-cutting drywall hole saws.
- Rotary Cutout Bits (e.g., RotoZip XB-DW Drywall Bit): Rotary tool bits feature guide-point tips that trace electrical boxes, duct openings, and door frames, quickly cutting openings in mounted sheets without damaging internal wiring or boxes.
Safety Precautions and In-Wall Hazard Prevention
Drilling into finished walls requires care to avoid concealed electrical circuits, plumbing runs, and structural supports.
Locating Studs and Safe Drilling Zones
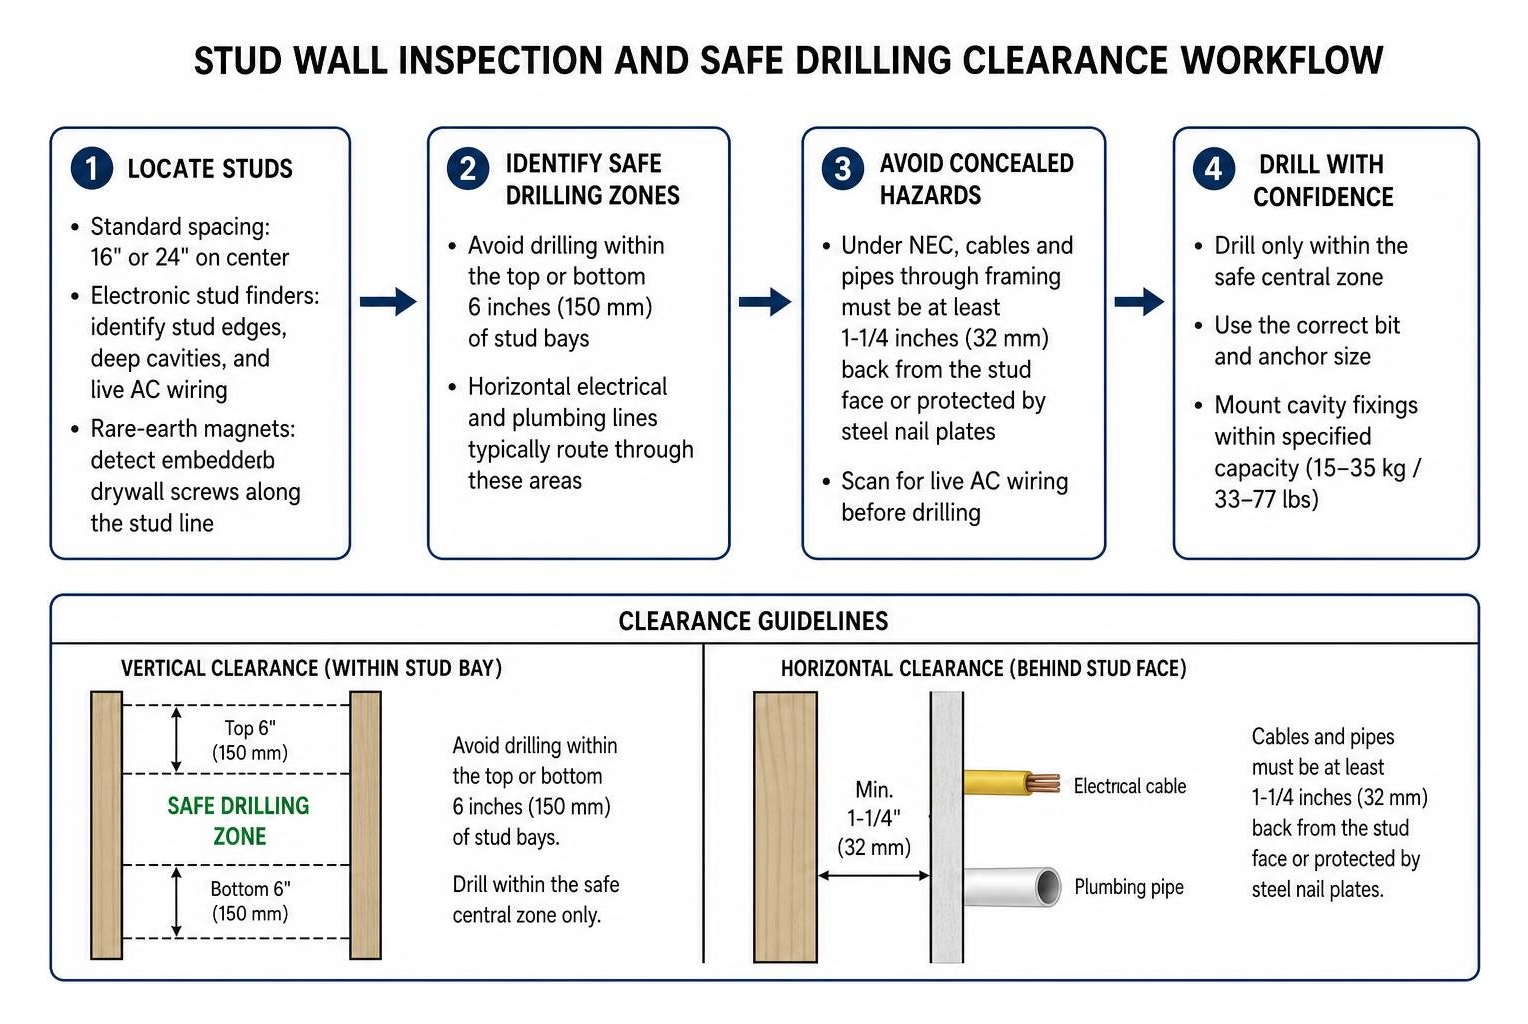
Standard US residential and commercial framing uses studs spaced at 16 inches or 24 inches on center.
- Electronic Stud Finders: Multi-scanners identify stud edges, deep cavities, and live AC wiring behind gypsum board.
- Rare-Earth Magnets: A practical alternative or confirmation method is using neodymium magnets to detect embedded drywall screws along the stud line.
- Safe Drilling Layouts: Avoid drilling within the top or bottom 6 inches (150 mm) of stud bays, where horizontal electrical and plumbing lines typically route through framing. Learn more from this stud wall drilling and safe zones guide.
Avoiding Electrical Wiring and Plumbing Lines
Under the US National Electrical Code (NEC), electrical cables and plumbing pipes passing through framing must sit at least 1-1/4 inches (32 mm) back from the stud face or be shielded by steel nail plates.
To maintain safety while drilling:
- Never drill deeper than 1 inch when installing anchors in open wall cavities.
- Wrap a strip of masking tape around your drill bit as a depth stop flag.
- If your drill bit hits sudden metal resistance, stop drilling immediately—you may have encountered a protective steel nail plate over high-voltage wiring or plumbing.
- Turn off circuit breakers and main water supply lines when drilling near wet walls or electrical service panels.
Frequently Asked Questions About Drywall Drilling and Fastening
Can you use a regular cordless drill to hang drywall?
Yes, you can use a standard drill/driver for small patch repairs or single sheets. To prevent paper tearing and core blowouts, equip your drill with a #2 Phillips drywall screw-setter bit and set the mechanical clutch to a low torque setting. For full rooms or repeated installations, a dedicated drywall screw gun provides significantly higher speed and reliable depth control.
What drill bit size should be used for plastic drywall anchors?
Check the manufacturer specifications printed on the anchor packaging. The pilot hole diameter should match the anchor’s central barrel, excluding the outer gripping ribs or expansion threads. Drilling slightly undersized produces a firm friction fit, whereas an oversized hole allows the anchor collar to spin loose when driven.
Why do drywall screws tear the paper surface when driven?
Drywall paper tears when high rotational speed combines with unregulated torque, or when a standard bit lacks a physical depth stop. Using an improper drive bit without an automatic disengagement clutch punches the screw head through the outer paper liner, weakening holding strength and requiring extra patch mudding.
Conclusion
Whether hanging structural drywall or installing everyday wall fixtures, using the proper drill and fastener setup saves time and prevents material damage. Standard cordless drill/drivers handle minor repairs when paired with magnetic screw-setter bits, while dedicated drywall screw guns and collated auto-feed systems deliver the speed and consistency required for full-scale residential and commercial framing.
Western Wholesale Supply has served contractors and builders across Eastern Idaho and Western Wyoming since 1963. From our branches in Idaho Falls, Pocatello, Jackson, Driggs, Victor, Rexburg, Rigby, Shelley, Blackfoot, Chubbuck, Burley, Kimberly, and Twin Falls, our veteran-owned, third-generation family business supplies professional building materials—including premium gypsum boards, Quietrock EZ Snap acoustic panels, Durock cement board, steel framing, insulation, CertainTeed ceiling tiles, and professional drywall finishing tools from Hyde, USG Sheetrock Tools, Columbia Taping Tools, and Marshalltown.
Ready to equip your next project with professional-grade gear? Explore our professional drywall tools and fasteners or stop by your nearest Western Wholesale Supply showroom today.
