

Get a Smooth Drywall Finish With Joint Compound
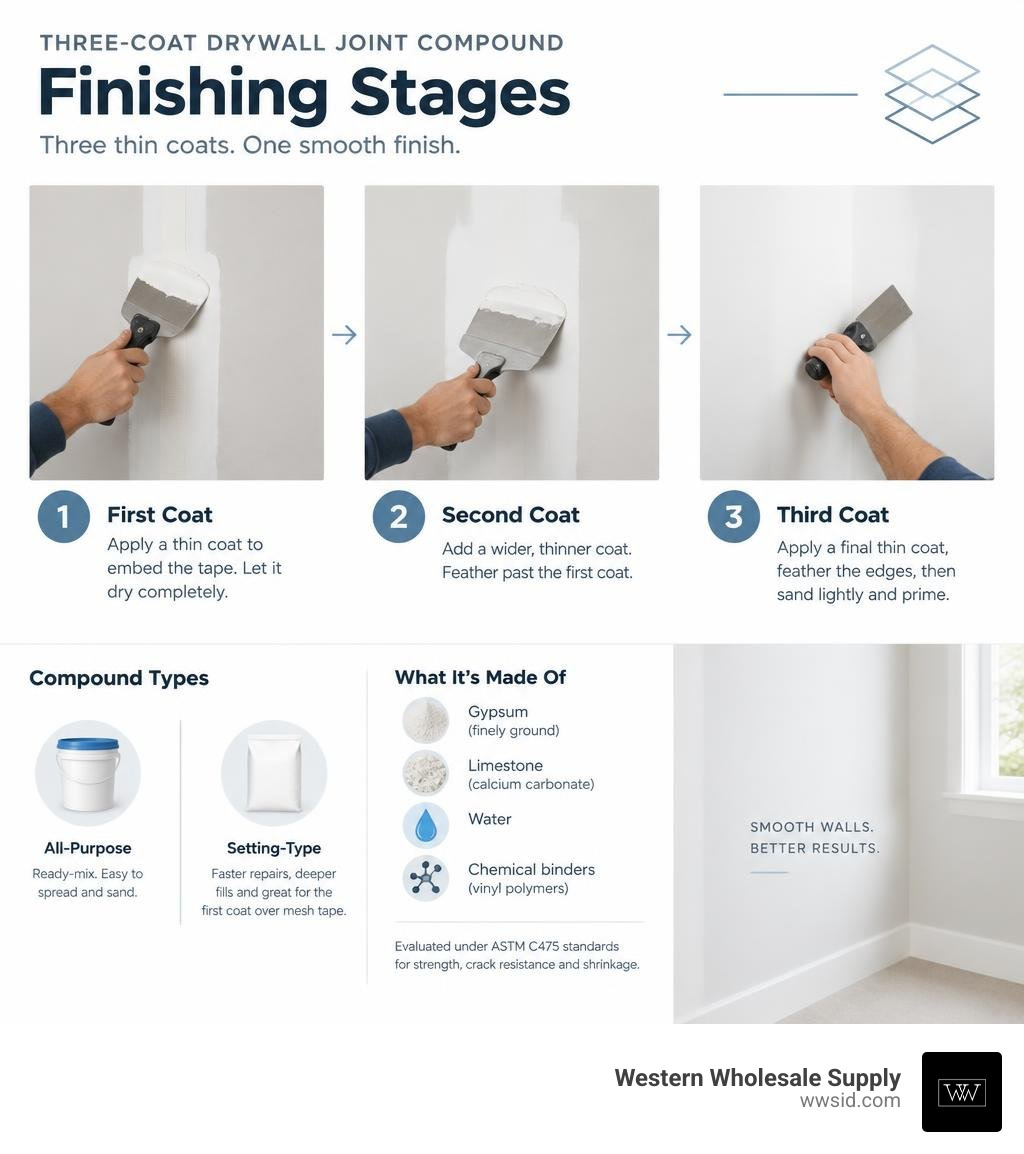
Joint compound, often called drywall mud, hides taped seams, fasteners, and corners so the wall looks like one continuous surface. For a clean finish, apply a thin coat to embed tape, let it dry fully, then add two wider, thinner coats. Feather each coat past the last, sand lightly, and prime before painting.
Most interior drywall jobs use a ready-mix all-purpose compound because it is easy to spread and sand. Setting-type compound, sometimes called hot mud, is useful for faster repairs, deeper fills, and the first coat over fiberglass mesh tape. Use clean tools, keep the room warm and ventilated, and avoid thick coats that can shrink or crack.
The right materials matter beyond the mud itself. A drywall project may also include Durock cement board in wet areas, Quietrock EZ Snap panels where sound control matters, Brighton Best or Grabber fasteners, and CertainTeed ceiling tiles on ceiling work. For finishing, dependable options include Hyde, USG Sheetrock Tools, Columbia Taping Tools, and Marshalltown knives, pans, and related tools.
We are Western Wholesale Supply, dedicated building-materials professionals serving drywall contractors and builders. Our experience with joint compound comes from helping crews match finishing materials and tools to real residential and commercial jobs.
Understanding Joint Compound Types and Formulations
Drywall mud is formulated primarily from finely ground gypsum, limestone (calcium carbonate), water, and chemical binders such as vinyl polymers. Formulations undergo rigorous evaluation under ASTM C475 standards to confirm tensile bond strength, crack resistance, and shrinkage limits.
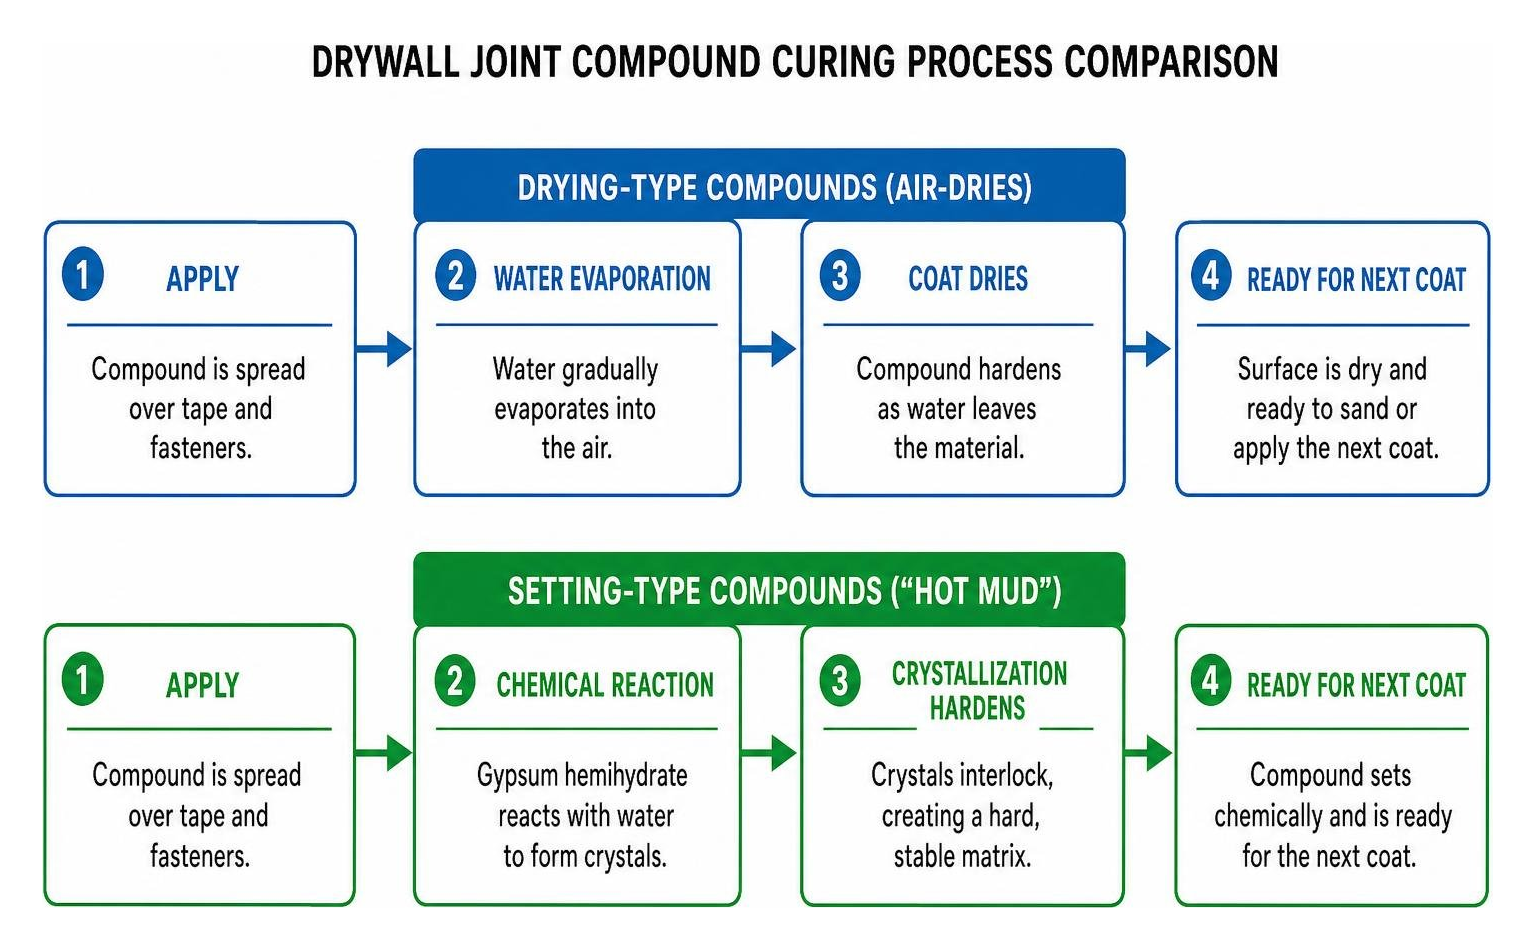
Drywall compounds function through two distinct mechanisms: physical evaporation (drying types) or chemical crystallization (setting types). Understanding these chemical profiles prevents common installation failures such as joint cracking or tape delamination.
| Feature | Drying-Type Compounds | Setting-Type Compounds (“Hot Mud”) |
|---|---|---|
| Primary Binder / Chemistry | Vinyl / Gypsum slurry (Air-dries via water loss) | Gypsum hemihydrate (Chemical crystallization) |
| Set Time Window | 12 to 24 hours per coat | 20, 45, 90, or 210 minutes |
| Shrinkage Level | Moderate to high as water evaporates | Very low to negligible |
| Sanding Difficulty | Easy to moderate | Moderate to very difficult (requires precise scraping) |
| Best Application Stage | 2nd and 3rd finishing coats, skim coating | Pre-filling gaps, embedding mesh tape, heavy fills |
| Moisture Vulnerability | Can re-emulsify if exposed to standing water | Water-resistant once chemically cured |
Ready-Mix vs. Setting-Type Joint Compound
Ready-mixed drying compounds cure strictly through water evaporation. When applied in heavy fills, the volume lost to water evaporation causes noticeable shrinkage and surface cracks.
Setting compounds—commonly referred to as “hot mud” because of the mild exothermic heat released during crystallization—rely on an internal chemical reaction. This reaction allows the material to harden uniformly regardless of coat thickness or high ambient humidity. Understanding how to choose the right drywall compound ensures you select the correct material for your room conditions.
Using 90-minute mud and other fast-setting formulas enables installers to apply multiple coats in a single day. When mixing powdered setting compounds:
- Always start with clean, room-temperature water in a clean mud pan or bucket.
- Sift the powder slowly into the water to avoid clumping.
- Mix thoroughly until you reach a smooth, lump-free consistency similar to cake frosting.
- Never add excess water once the chemical reaction starts, as re-tempering degrades the internal crystal matrix and weakens structural bond strength.
Lightweight and Specialty Formulations
Modern manufacturing produces specialized formulations designed to reduce user fatigue and enhance indoor air quality. According to the USG Sheetrock Midweight submittal data, midweight and ultralightweight formulas reduce package weight by 15% to 40% compared to traditional conventional-weight compounds. They incorporate microscopic polymer or perlite spheres that maintain volume while delivering superior sandability and reduced shrinkage.
Indoor environmental safety is heavily influenced by these formulations. Standard ready-mix formulas often carry GREENGUARD Gold certification, demonstrating volatile organic compound (VOC) levels below 2 g/L. In commercial structures subject to building movement, exploring flexible joint compound performance provides insight into products engineered to absorb dynamic framing shifts without joint failure.
Essential Tools and Jobsite Preparation

Achieving a high-end, Level 4 or Level 5 finish requires high-quality hand tools and systematic substrate preparation. Equipping your workspace with essential drywall finishing supplies prevents costly interruptions during the application cycle.
Before opening a bucket of mud, inspect the gypsum board. Confirm all drywall screws are driven slightly below the paper face without breaking the core paper. Remove loose gypsum core material, torn paper, dust, and framing oil. Jobsite environmental conditions require an ambient temperature of at least 55°F (13°C) continuously for 48 hours prior to, during, and after application.
In warehouse settings or commercial facilities, maintaining proper thermal control (such as Ceilings R-30+ and Walls R-13+ insulation performance) protects the drying mud from sudden thermal drops that disrupt evaporation and cause joint failure.
Selecting the Right Taping Knives and Blades
Using premium, professional-grade hand tools allows for precise mud distribution, smooth transitions, and minimal sanding effort:
- Hyde Flexible Taping Knives: Smaller 4-inch to 6-inch flexible carbon or stainless steel knives give you the tactile feedback needed to firmly bed paper tape into seams and corner angles without gouging the board.
- Marshalltown Mud Pans: Heavy-gauge stainless steel mud pans with straight, laser-welded contoured bottoms ensure a clean knife wipe on every pass.
- USG Sheetrock Tools: Ergonomic matrix knives and corner trowels deliver balanced weight distribution, reducing wrist strain over long shifts.
- Columbia Taping Tools: Mechanical flat boxes, angle heads, and continuous-flow finishing tools drastically cut production time on expansive wall runs.
To build an efficient tool kit, review the complete A-Z guide to taping knives. For subsequent coats, mastering 12-inch taping knives ensures smooth feathering across wide seams, while adding wide skimming blades creates uniform Level 5 skim coats. For specialty corner work, consult our overview of drywall edge tools.
Step-by-Step Guide to Applying Drywall Mud
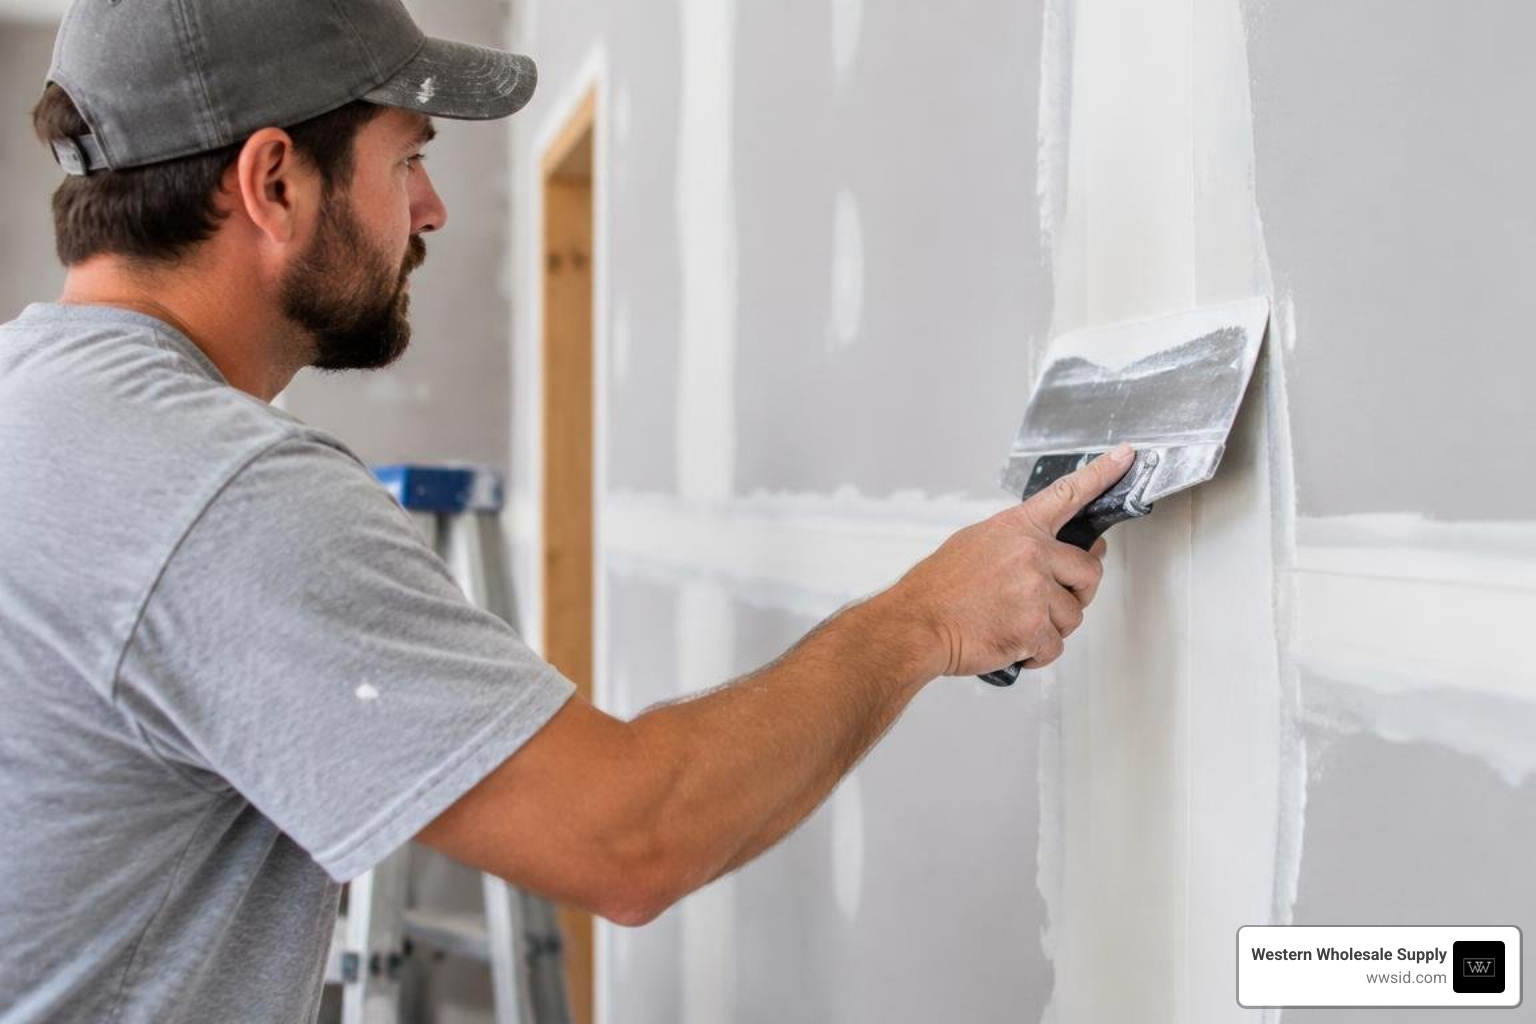
A professional finish relies on building thin, progressive layers rather than applying a single heavy coat. Follow this 3-coat sequence:
- Bedding Coat: Fill the recessed factory channel and firmly bed your joint tape.
- Filler Coat (Feathered 2 inches beyond base): Conceal the tape edges and level the factory taper.
- Finish Coat (Feathered another 2 inches outward): Eliminate minor pinholes and blend the seam invisibly into the gypsum board.
Taping and Bedding Coat Application
Before taping, pre-fill any gaps between panels wider than 1/8-inch using a setting-type compound. For standard taped seams:
- Use a 5-inch or 6-inch Hyde taping knife to apply a consistent 1/8-inch bed of all-purpose mud into the drywall recess.
- Center your paper tape directly over the joint seam.
- Hold your knife at a 45-degree angle and smooth down the center of the tape with firm, even pressure. This embeds the tape and squeezes out excess mud, leaving a 1/32-inch bedding layer beneath.
- Avoid scraping the tape completely dry, as insufficient compound causes blisters and tape separation.
- Cover all recessed fastener heads with a smooth pass of your knife.
Applying the Filler and Finish Skim Coats
Allow the first coat to dry completely. Scrape away small ridges or high spots using the edge of your 6-inch knife:
- Second Coat: Using an 8-inch or 10-inch USG Sheetrock knife, apply your compound across the seam. Feather the outer edges roughly 2 inches past the edges of the initial bedding coat by applying more pressure on the outside blade edge.
- Third Coat: Once dry, use a 12-inch Marshalltown knife or skimming blade to apply an ultra-thin finish layer. Feather this coat an additional 2 inches wider on both sides.
- Maintain a slightly thinner mud consistency for the topcoat by blending in clean water in half-pint increments.
- Perform light inter-coat sanding with fine 150- to 220-grit paper or a damp sponge once fully cured.
Troubleshooting Defects, Drying Times, and Environmental Factors
The standard drying baseline for conventional ready-mix mud is approximately 24 hours at 70°F (21°C) and 70% relative humidity. When jobsite temperatures drop or humidity rises, drying rates slow significantly. For detailed specifications, refer to the USG Sheetrock joint compound technical guide.
Common drywall defects and their corrective solutions include:
- Blistering Tape: Caused by dry spots under the tape where insufficient mud was applied. To fix, slice the dry blister open with a razor knife, inject fresh compound beneath the loose paper, and press the tape back into place with a 6-inch blade.
- Shrinkage Cracks (Mud Cracking): Occurs when drying-type compound is applied too thickly. Sand the ridge flat, remove residual dust, and apply two thin, feathered coats of lightweight mud.
- Pinholes and Pockmarks: Caused by applying mud over unsealed paint or trapping air pockets during high-speed bucket mixing. Fix by skimming a tight, thin layer of finish mud firmly across the surface at a steep blade angle.
Essential Safety Measures When Sanding Joint Compound
Sanding dried gypsum compound creates fine, airborne dust containing calcite, mica, talc, and respirable crystalline silica. Prolonged inhalation of crystalline silica poses serious long-term respiratory hazards.
- Always wear a NIOSH-approved N95 or N100 particulate respirator when sanding.
- Wear impact-resistant safety glasses to prevent eye irritation.
- Seal off HVAC supply and return ducts in the work area to prevent dust migration.
- Utilize a vacuum-assisted pole sander equipped with a HEPA filter, or use a damp drywall sponge for dust-free wet sanding on small residential patches.
- Ensure cross-ventilation by placing exhaust fans in exterior windows during mechanical sanding.
Frequently Asked Questions About Drywall Mud
How long does mud take to dry between coats?
Under standard conditions of 70°F (21°C) and 70% relative humidity, ready-mix all-purpose compound takes roughly 24 hours to cure completely per coat. Lower ambient temperatures, poor airflow, or heavy application can extend drying times beyond 36 hours. Chemical setting-type compounds harden within their designated rating (e.g., 20, 45, or 90 minutes), though residual moisture must fully evaporate before painting.
Can you apply ready-mix mud over fiberglass mesh tape?
No. Standard ready-mix drying compounds must never be used for the first bedding coat over fiberglass mesh tape. Because mesh tape lacks the structural tensile strength of paper tape, using a drying-type compound will lead to hairline cracks along the seam under structural stress. You must embed fiberglass mesh tape using a setting-type compound (“hot mud”) for the initial coat; ready-mix mud can then be safely used for the second and third finish coats.
How do you fix blistered tape or cracking in dried mud?
To repair blistered tape, use a sharp utility knife to cut through the dry, unbonded section of tape. Peel away the loose paper, scrape away dried loose mud beneath, and apply a fresh layer of setting-type or all-purpose compound directly into the cavity. Re-embed the tape or apply a new strip of paper tape, wipe smooth, and apply two feathered finish coats.
Conclusion
Mastering drywall finishing comes down to using the right mud formulas, high-quality knives, and patient, progressive feathering coats. At Western Wholesale Supply, we have supported residential and commercial builders across Eastern Idaho and Western Wyoming since 1963.
Whether you are completing a residential basement or managing a commercial development, visit our showrooms in Idaho Falls, Pocatello, Jackson, and regional branches to find high-performance drywall mud and lightweight compound solutions alongside the industry’s best finishing tools.
