

Why Every Echo-Prone Room Needs DIY Ceiling Acoustic Panels
Ceiling acoustic panels DIY projects are one of the most effective ways to reduce echo and improve sound quality in a room — without spending a fortune on commercial solutions.
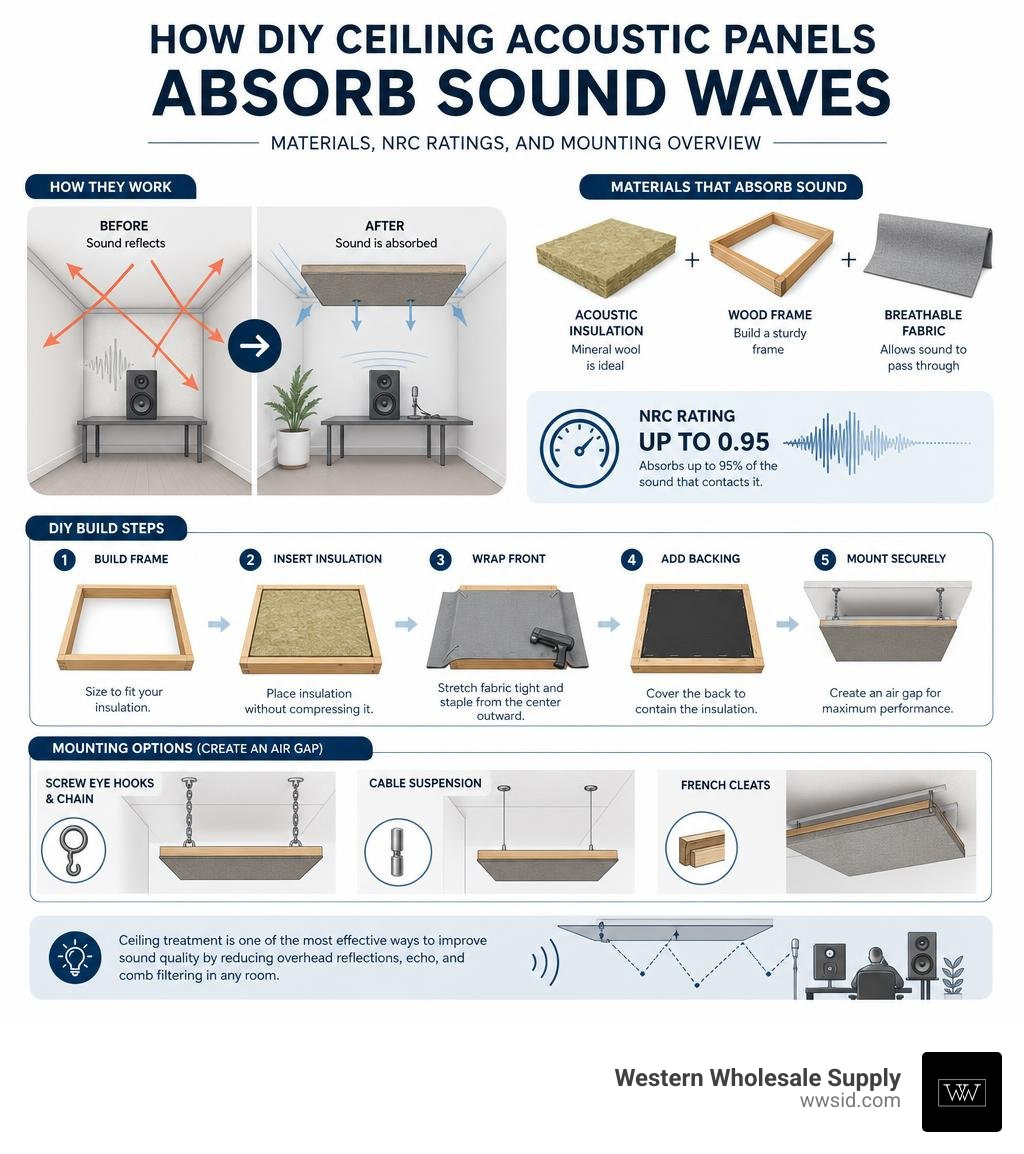
Here is a quick overview of how to build and mount your own ceiling acoustic panels:
- Build a wooden frame sized to fit your insulation (typically 2×4 ft or 4×4 ft)
- Insert acoustic insulation such as mineral wool or Owens Corning 703 without compressing it
- Wrap the frame tightly in breathable fabric, stapling from the center outward
- Add a backing layer of fabric to contain the insulation on the ceiling-facing side
- Mount securely into ceiling joists using screw eye hooks, chain suspension, or French cleats to create an air gap
DIY ceiling panels can achieve an NRC (Noise Reduction Coefficient) rating of up to 0.95 — meaning they absorb an average of 95% of the sound that contacts them. That is the same performance level as many commercial panels, at a fraction of the cost.
Hard surfaces like concrete floors, drywall ceilings, and bare walls create sound reflections that make a room feel loud and muddy. Treating your ceiling is especially important because it is one of the largest untreated surfaces in most rooms, and overhead reflections are a primary cause of comb filtering and poor audio clarity in home studios, workshops, and home theaters.
We are Western Wholesale Supply, a building materials professional team with deep experience sourcing insulation, framing, and acoustical products for contractors across Idaho and Wyoming — including everything you need for a ceiling acoustic panels DIY build. In the sections below, we’ll walk you through exactly how to get this done right.
Learn more about ceiling acoustic panels diy:
Why Choose DIY Ceiling Acoustic Panels?
If you have ever stood in an empty room and clapped your hands, you know how harsh and fluttery a space can sound before it is properly treated. While wall panels do a fantastic job of catching horizontal reflections, your ceiling is often a massive, wide-open highway for stray sound waves.
Choosing to build your own ceiling acoustic panels diy setup is one of the smartest decisions you can make for your ears and your wallet. By taking the DIY route, you maintain complete control over the design, size, fabric choice, and placement. Whether you are setting up a home recording studio in Idaho Falls, a home theater in Jackson, WY, or a quiet office space in Pocatello, custom ceiling-mounted panels (often called ceiling clouds) will target the vertical reflections that muddy your audio.
When you install these panels overhead, you are directly intercepting the sound waves that travel from your speakers or voice to the ceiling and bounce right back down to your ears. This simple intervention dramatically improves stereo imaging, tightens up bass response, and makes vocal recordings sound incredibly dry and professional.
To understand how ceiling treatments fit into a complete room design, check out A Comprehensive Guide To Ceiling Sound Treatment.
Cost Savings of Building Your Own Ceiling Acoustic Panels DIY
Let’s face it: buying pre-made commercial acoustic panels can get incredibly expensive, especially once you factor in the high costs of shipping large, fragile items to our neck of the woods in Eastern Idaho or Western Wyoming. When you buy commercial panels, a massive portion of your budget goes toward the manufacturer’s assembly labor, packaging, and freight.
By rolling up your sleeves and sourcing your own raw materials, you can build a complete set of high-performance panels for a fraction of the cost of commercial alternatives. In fact, many DIYers find they can build an entire room’s worth of custom panels for the price of just one or two pre-made commercial units. This allows you to treat your first reflection points, build corner bass traps, and hang a multi-panel ceiling cloud without breaking the bank.
To see a detailed breakdown of how these savings multiply across a full room build, you can read through the DIY Acoustic Panel Guide | Corey Bautista Audio.
Here is a quick comparison of what you are paying for when comparing DIY vs. commercial options:
| Cost Factor | DIY Ceiling Panels | Commercial Pre-Made Panels |
|---|---|---|
| Frame Material | Low-cost local lumber or plywood | Proprietary high-margin frames |
| Core Insulation | Bulk mineral wool or fiberglass | Markup on pre-cut cores |
| Fabric Customization | Unlimited budget-friendly choices | Limited, expensive premium lines |
| Shipping & Handling | Zero (pick up locally in Idaho or WY) | Extremely high freight for oversized boxes |
| Overall Value | Outstanding (same NRC rating for less) | Convenient but highly expensive |
Materials and Tools for Your Ceiling Acoustic Panels DIY Project
Building your own acoustic panels does not require a workshop full of specialized, expensive tools. If you have ever put together flat-pack furniture, you have more than enough skill to tackle this project.
Before you begin, gather the following essential tools and materials:
- Miter saw or hand saw (for cutting your frame boards to length)
- Staple gun and staples (pneumatic or heavy-duty manual for securing the fabric)
- Drill and driver bits
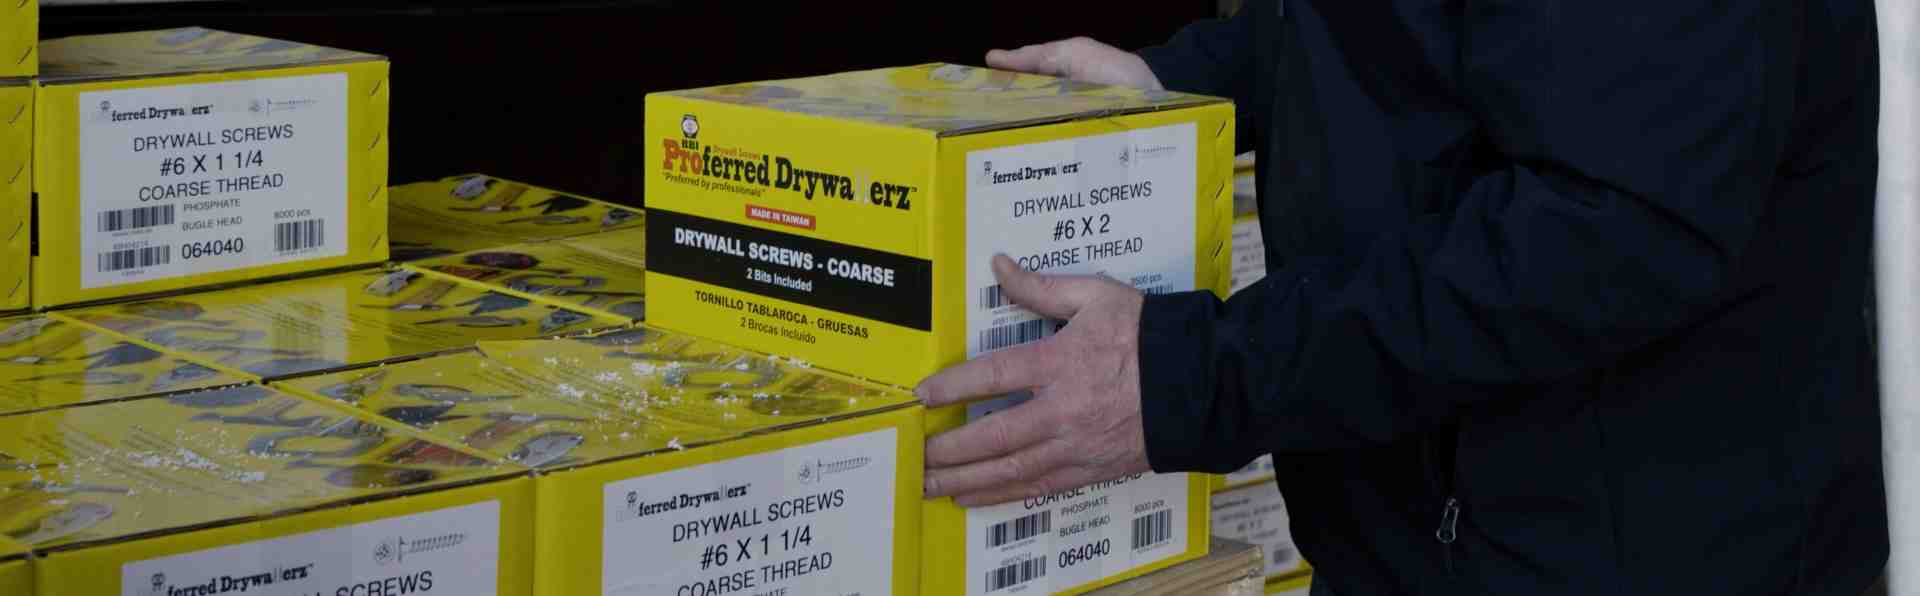
- High-quality fasteners (we highly recommend Grabber or Brighton Best screws for strong, reliable joints that won’t pull apart over time)
- Wood glue (to reinforce the frame corners)
- Tape measure and pencil
- Safety gear (safety glasses, work gloves, and a reliable dust mask or respirator)
Selecting the Best Acoustic Insulation Core
The heart of any acoustic panel is its core material. This is what does the heavy lifting, trapping sound waves and converting their energy into tiny amounts of heat. For ceiling applications, you need a material that is dense enough to absorb low and mid frequencies but light enough to hang safely overhead.
The three most popular choices for DIY builders are:
- Mineral Wool (such as Rockwool): This is widely considered the gold standard for DIY acoustic panels. It is highly rigid, easy to cut with a bread knife, and offers exceptional sound absorption across a broad frequency spectrum.
- Owens Corning 703: A rigid fiberglass board that is incredibly lightweight and easy to work with. It holds its shape perfectly over time, making it an excellent choice for frameless or lightweight ceiling clouds.
- Eco-friendly alternatives (like eco-C-tex): Made from recycled cotton and cellulose fibers, these panels are completely fiberglass-free and non-toxic, making them highly pleasant to handle.
At Western Wholesale Supply, we love building materials that pull double duty. While you are selecting insulation for its acoustic performance, do not forget its thermal benefits. If you are treating a large workshop, garage, or commercial warehouse in cold climates like Rexburg or Driggs, high-quality ceiling insulation does more than just quiet the room. Installing insulation with an R-30+ rating in your ceilings and an R-13+ rating in your walls will dramatically cut down your heating bills while keeping your workspace quiet and comfortable all winter long.
To learn more about how different insulation cores perform under testing, take a look at the comprehensive guide on How to Build Your Own DIY Acoustic Panels | Black Ghost Audio.
Choosing Acoustically Transparent Fabrics
Once you have chosen your insulation core, you need to wrap it in a fabric that looks great but does not block sound waves. If the fabric is too dense or tightly woven (like vinyl or heavy leather), sound waves will bounce right off the surface instead of penetrating the core, defeating the purpose of your panel.
To test if a fabric is acoustically transparent, hold it up to your mouth and try to blow through it. If you can breathe through it easily, sound waves can pass through it easily too.
Excellent fabric choices include:
- Polyester felt: Budget-friendly, highly durable, and naturally wrinkle-resistant.
- Open-weave cotton or muslin: Offers a clean, natural look and is very easy to stretch tightly.
- Burlap: A classic, ultra-affordable option for workshops and industrial spaces, though it can shed fibers if not handled carefully.
Pro-Tip for Ceiling Safety: Because these panels will hang directly over your head, fiber containment is crucial. We highly recommend a double-wrapping technique. Wrap the raw insulation core in a thin, breathable layer of landscape fabric or polyester felt first, and then apply your decorative outer fabric. This guarantees that no tiny fibers or dust particles can escape and drift down into your living space over time.
Step-by-Step Guide to Building and Mounting Ceiling Acoustic Panels
Now that you have gathered your tools and selected your materials, it is time to start building. Follow these steps to construct a professional-grade ceiling panel that looks as good as it performs.
For a deeper dive into the physics and placement of these overhead installations, refer to our article on Ceiling Mounted Acoustic Panels.
Constructing the Wooden Frame
The key to a professional-looking panel is a sturdy, perfectly square frame.
- Measure your insulation core: Always build your frame to match the exact dimensions of your insulation boards (typically 24″ x 48″).
- Cut your lumber: Use standard 1×3 or 1×4 pine boards. Cut two long sides to 48″ and two short ends to 22.5″ (assuming your wood is 3/4″ thick, this will create an outer frame dimension of exactly 24″ x 48″).
- Assemble the outer frame: Use wood glue and pocket holes or pre-drilled pilot holes to join the corners. Fasten them securely using heavy-duty Grabber screws.
- Add support strips: To prevent the insulation from sagging or falling out of the frame over time, screw thin wooden support strips or a lightweight backing wire across the rear of the frame.
- Sand the edges: Use 120-grit sandpaper to smooth out any rough edges or corners on the frame. This prevents the fabric from snagging or tearing when you stretch it tight.
Safely Mounting Your Ceiling Acoustic Panels DIY
Hanging heavy objects overhead requires absolute precision and the right hardware. Never rely on simple drywall anchors for a ceiling installation; you must secure your mounting hardware directly into the wooden ceiling joists.
- Locate your joists: Use a high-quality stud finder to locate the ceiling joists above your listening position. Mark them clearly.
- Install screw eye hooks: Screw heavy-duty eye hooks directly into the ceiling joists. On the back of your acoustic panel frame, install matching eye hooks into the wooden frame corners.
- Use chain suspension: Connect the panel to the ceiling using small chains and carabiners. This allows you to easily adjust the height of the panel.
- Create an air gap: Suspending your panel a few inches below the ceiling ceiling cloud style actually doubles its effectiveness! When sound waves pass through the panel, they hit the ceiling, bounce back, and have to pass through the panel a second time. This air gap significantly boosts low-frequency absorption.
To learn more about the design and aesthetic benefits of suspended ceiling clouds, check out our guide on All About Acoustic Ceiling Clouds.
Frequently Asked Questions about DIY Ceiling Acoustic Panels
How do you prevent insulation from sagging in ceiling panels?
Over time, gravity can cause soft insulation cores to sag or bow downward, creating unsightly bulges in your fabric. To prevent this, always use rigid insulation boards (like Owens Corning 703 or rigid mineral wool boards) rather than loose, soft batting.
Additionally, install support wires, a lightweight plastic garden mesh, or a criss-cross grid of heavy-duty fishing line across the back and front of the frame before wrapping it in fabric. This holds the insulation tightly in place forever.
What is the difference between wall and ceiling acoustic panels?
While they use the same basic insulation cores, wall and ceiling panels differ significantly in their mounting hardware and exposure to gravity. Wall panels are typically mounted flush to the wall using simple French cleats or picture wire.
Ceiling panels, however, require robust mechanical fasteners (like Grabber or Brighton Best screws secured into joists) to prevent them from falling. They are also frequently suspended on chains to create an air gap, which targets lower frequencies more effectively than flush-mounted wall panels.
Can I use these panels to soundproof a ceiling?
This is the most common point of confusion in acoustics! Acoustic panels do not soundproof a room. They are designed for sound absorption (reducing echo and improving the sound quality inside the room). They will not block your upstairs neighbors’ footsteps or stop sound from escaping your studio.
If your goal is to actually block sound transmission through your ceiling, you need to add density and damping to the ceiling structure itself. We highly recommend installing a specialized damping drywall like Quietrock EZ Snap directly to your ceiling joists to block airborne sound transmission.
Conclusion
Building your own ceiling acoustic panels diy setup is a highly rewarding weekend project that delivers professional-grade sound control at a fraction of the cost of commercial alternatives. By selecting high-quality insulation, wrapping it in breathable fabric, and mounting it securely with trusted fasteners, you can transform any noisy, echo-prone room into a pristine acoustic environment.
At Western Wholesale Supply, we have been helping builders, contractors, and DIYers across Eastern Idaho and Western Wyoming bring their projects to life since 1963. Whether you are looking for high-performance insulation, premium drywall, or professional ceiling systems, our team is dedicated to providing reliable, on-time delivery and expert advice from our convenient local branches.
If you are ready to take your acoustic project to the next level with professional materials, explore our options for Western Wholesale Supply Acoustical Ceilings or drop by one of our locations today!
